
orhun/gpg-tui

orhun/gpg-tui — a developer tool — sits at 1.8k GitHub stars in the Developer Tools space. Manage your GnuPG keys with ease! 🔐
Snapshot summary built from the project's own GitHub metadata — there's no written TopGit review yet. The page will update automatically when a full review is published.
TopGit writes full reviews for the most-starred, most-requested repositories. This page is a snapshot until then — see the READ ME tab for the original README in full.
Snapshot
Top contributors
Show top contributors


About
gpg-tui is a Terminal User Interface for GnuPG.
It aims to ease the key management operations such as listing/exporting/signing by providing an interface along with the command-line fallback for more complex operations. It is not trying to be a full-fledged interface for all the features that gpg provides but it tries to bring a more interactive approach to key management.
Demo

gpg-tui --style colored --splash --homedir /etc/pacman.d/gnupg
Table of Contents
- Requirements
- Installation
- Cargo
- Arch Linux
- Community
- AUR
- Alpine Linux
- Gentoo
- Homebrew
- Docker
- Docker Hub
- Using the Dockerfile
- FreeBSD
- Building from source
- Binary releases
- NetBSD
- Install using the package manager
- Building from source
- Manually
- Building from source
- Binary releases
- Usage
- Configuration
- Key Bindings
- User Interface
- Key Management
- Customization
- Approach
- Detail Levels
- Key Information
- User Information
- Features
- User Interface
- Scrolling
- Options Menu
- Copy / Paste
- Selection Mode
- Detailed View
- Search
- File explorer
- Show logs
- Running commands
- Key Management
- List
- Export
- Sign
- Edit
- Import/Receive
- Send
- Generate
- Delete
- Refresh
- Styling
- Colors
- Splash screen
- User Interface
- Roadmap
- Platforms
- Packaging
- Command-Line Fallback
- Key Management Only
- Resources
- About the project
- External links
- In the media
- Contact
- Funding
- License
- Copyright
Requirements
- Rust:
>=1.87.0 - Core dependencies:
gnupg,gpgme>=1.12.0,libgpg-error - Other dependencies:
libxcb
Please note that the name of these dependencies (packages) might change depending on the distribution/platform.(*)
For installing these dependencies:
- on Arch Linux, run
pacman -S gpgme libx11 - on Debian/Ubuntu, run
apt-get install libgpgme-dev libx11-dev libxcb-shape0-dev libxcb-xfixes0-dev libxkbcommon-dev - on Fedora, run
dnf install gpgme-devel libX11-devel - on Void Linux, run
xbps-install -S gpgme-devel libxcb-devel libgpg-error-devel gnupg
Installation
Packaging status

Cargo
gpg-tui is available on crates.io:
cargo install gpg-tui
Arch Linux
Community
gpg-tui can be installed from the extra repository using Pacman:
pacman -S gpg-tui
AUR
gpg-tui is also available on AUR and it can be installed with an AUR helper:
paru -S gpg-tui-git
Or if you prefer, you can clone the AUR packages and compile them with makepkg:
# clone the AUR repository
git clone https://aur.archlinux.org/gpg-tui-git.git && cd gpg-tui-git/

# build the package
makepkg -si
Alpine Linux
gpg-tui is available for Alpine Edge. It can be installed via apk after enabling the community repository.
apk add gpg-tui
Gentoo
Available in dm9pZCAq overlay
eselect repository enable dm9pZCAq
emerge --sync dm9pZCAq
emerge app-crypt/gpg-tui::dm9pZCAq
Homebrew
To install the Homebrew package, run:
brew install gpg-tui
To update, run:
brew upgrade gpg-tui
Docker
Docker Hub
See available tags.
docker pull orhunp/gpg-tui:[tag]
You can also use the following command for a quick launch:
docker run --rm -it -v "$HOME/.gnupg":/app/.gnupg --user 1000:1000 orhunp/gpg-tui --homedir /app/.gnupg
Using the Dockerfile
# clone the repository
git clone https://github.com/orhun/gpg-tui.git && cd gpg-tui/

# build the image
docker build -t gpg-tui .

# run the container
docker run -it gpg-tui
FreeBSD
All required dependencies are automatically fetched and installed independently of the installation method chosen.
Building from source
# using a port
cd /usr/ports/security/gpg-tui
make install
# alternative method using portmaster
portmaster security/gpg-tui
Binary releases
# update repository catalogue (if outdated)
pkg update

# fetch and install the package
pkg install gpg-tui
NetBSD
gpg-tui is available from the main pkgsrc branch.
Install using the package manager
pkgin install gpg-tui
Building from source
cd /usr/pkgsrc/security/gpg-tui
make install
Manually
Building from source
# clone the repository
git clone https://github.com/orhun/gpg-tui.git && cd gpg-tui/

# build and install
cargo install --root "$HOME/.cargo" --path .
Binary releases
See available releases that are automated by Continuous Deployment workflow.
Usage
gpg-tui [OPTIONS]
Options:
  -a, --armor                 Enables ASCII armored output
      --splash                Shows the splash screen on startup
      --config <path>         Sets the configuration file [env: GPG_TUI_CONFIG=]
      --homedir <dir>         Sets the GnuPG home directory [env: GNUPGHOME=]
  -o, --outdir <dir>          Sets the output directory [env: OUTDIR=]
      --outfile <path>        Sets the template for the output file name [env: OUTFILE=] [default: {type}_{query}.{ext}]
  -d, --default-key <key>     Sets the default key to sign with [env: DEFAULT_KEY=]
  -t, --tick-rate <ms>        Sets the tick rate of the terminal [env: TICK_RATE=] [default: 250]
  -c, --color <color>         Sets the accent color of the terminal [env: COLOR=] [default: gray]
  -s, --style <style>         Sets the style of the terminal [env: STYLE=] [default: colored] [possible values: plain, colored]
  -f, --file-explorer <app>   Sets the utility for file selection [env: FILE_EXPLORER=] [default: xplr]
      --detail-level <level>  Sets the detail level for the keys [env: DETAIL_LEVEL=] [default: minimum] [possible values: minimum, standard, full]
      --log-file <path>       Sets the file to save the logs [env: LOG_FILE=]
      --select <option>       Enables the selection mode [env: SELECT=] [possible values: row1, row2, key, key-id, key-fingerprint, user-id]
  -h, --help                  Print help (see more with '--help')
  -V, --version               Print version
Configuration
It is possible to override the command line arguments with a configuration file.
See gpg-tui.toml for the default configuration values.
The configuration file can be specified via --config argument or GPG_TUI_CONFIG environment variable. Also, it can be placed to a location where gpg-tui looks for:
<config_dir>/gpg-tui.toml<config_dir>/gpg-tui/gpg-tui.toml<config_dir>/gpg-tui/config
<config_dir> depends on the platform as shown in the following table:
| Platform | Value | Example |
|---|---|---|
| Linux | $XDG_CONFIG_HOME or $HOME/.config | /home/alice/.config |
| macOS | $HOME/Library/Application Support | /Users/Alice/Library/Application Support |
| Windows | {FOLDERID_RoamingAppData} | C:\Users\Alice\AppData\Roaming |
Key Bindings
User Interface
| Key Binding | Action |
|---|---|
? | show help |
o,space,enter | show options |
hjkl,arrows,pgkeys | navigate |
n | switch to normal mode |
v | switch to visual mode |
c | switch to copy mode |
p,C-v | paste from clipboard |
a | toggle armored output |
1,2,3 | set detail level |
t,tab | toggle detail (all/selected) |
` | toggle table margin |
m | toggle table size |
C-s | toggle style |
/ | search |
: | run command |
C-l,f2 | show logs |
r,f5 | refresh application |
q,C-c/d,escape | quit application |
Key Management
| Key Binding | Action |
|---|---|
x | export key |
s | sign key |
e | edit key |
i | import key(s) |
f | receive key |
u | send key |
g | generate key |
d,backspace | delete key |
C-r | refresh keys |
Customization
Key bindings can be overridden/customized via using general.key_bindings setting in the configuration file. For example,
key_bindings = [
  { keys = [ "?", "h", "f1" ], command = ":help" },
  { keys = [ "C-s", "s" ], command = ":style colored" },
  { keys = [ "C-d", "C-c", "q" ], command = ":quit" },
]
keys array contains the keycodes which is either a single key (e.g. a), a key combination (e.g. Control-C: C-c, Alt-C: A-c), or a special key (e.g. Backspace, Enter). Available key codes can be found in the crossterm documentation.
Also, see the list of commands.
Approach
Available keys in the keyring (which can be specified via --homedir argument) are showed on a table. This table consists of 2 columns which are key information and user information.
The level of detail that an individual table row shows is determined by detail levels.
Detail Levels
- Minimum: shows only the primary key and user ID.
[sc--] rsa3072/B14085A20355B74DE0CE0FA1E19F76D037BD65B6 │ [u] Example Key <example@key>
- Standard: shows all the subkeys and user IDs.
[sc--] rsa3072/B14085A20355B74DE0CE0FA1E19F76D037BD65B6  │  [u] Example Key <example@key>
|      └─(2021-05-14)                                    │   └─[u] Other User ID <example@key>
[--e-] rsa3072/E56CAC142AE5A979BEECB00FB4F68595CAD4E7E5  │
       └─(2021-05-14)
- Full: shows signatures and notations.
[sc--] rsa3072/B14085A20355B74DE0CE0FA1E19F76D037BD65B6  │  [u] Example Key <example@key>
|      └─(2021-05-14)                                    │   │  └─[13] selfsig (2021-05-16)
[--e-] rsa3072/E56CAC142AE5A979BEECB00FB4F68595CAD4E7E5  │   │     └─[h] test@notation=xyz
       └─(2021-05-14)                                    |   └─[u] Other User ID <example@key>
                                                                   ├─[13] selfsig (2021-05-16)
                                                                   └─[10] 84C39331F6F85326 Other Signer Key <example@signer> (2021-05-16)
Detail level can be set using --detail-level argument or detail_level entry in the configuration file.
Key Information
An example table entry for the detail level full (which includes subkeys) is explained via reference numbers below.
[sc--]⁰  rsa3072¹/B14085A20355B74DE0CE0FA1E19F76D037BD65B6²
|³       └─(2021-05-14)⁴
[--e-]⁰*⁶rsa3072¹/E56CAC142AE5A979BEECB00FB4F68595CAD4E7E5²
         └─(2021-05-14) -> (2021-05-16)⁴ [exp]⁵
0: Key flags. Determines what the key can do.
s: signc: certifye: encrypta: authenticate
1: Algorithm of the key.
2: Fingerprint of the key.
3: Indicates that the next key is a subkey.
4: Time information of the key:
- creation time (
Y-m-d) - expiration time (
Y-m-d)
5: Is the key one of the following?
[exp]: expired[rev]: revoked[d]: disabled[i]: invalid[q]: qualified
6: Star symbol (*) is shown after key flags if the key is selected as the default signing key.
User Information
An example table entry for the detail level full (which includes other user IDs, signatures and notations) is explained via reference numbers below.
[u]⁰ Test Key <test@test>¹
 │²  └─[13]³ selfsig⁴ (2021-05-16)⁶
 │             └─[h]⁹ test@notation=xyz⁸
 └─[u]⁰ Test Key2 <test2@test2>¹
        ├─[13]³ selfsig⁴ (2021-05-16)⁶
        └─[10]³ 84C39331F6F85326 Test Key 2 <[email protected]>⁵ (2021-05-16)⁶ [!x]⁷
0: Validity of the user.
[q]: undefined[n]: never[m]: marginal[f]: full[u]: ultimate[?]: unknown
1: User ID. (name + email)
2: Indicates the next user ID.
3: Certification level of the signature.
[10]: no indication[11]: personal belief but no verification[12]: casual verification[13]: extensive verification
4: Indicates that this is a self signature, whereby the users' own private key was used to sign their public key.
5: Key and user ID of the signer. (key + name + email)
6: Time information of the signature.
- creation time (
Y-m-d) - expiration time (
Y-m-d)
7: Is the signature one of the following?
[exp]: expired[rev]: revoked[i]: invalid[!x]: non-exportable
8: Notation data.
9: Flags associated with the notation data.
[h]: the notation data is in human readable form[!]: the notation data is critical
Features
Press ? while running the terminal interface to see information about key bindings and GnuPG configuration.
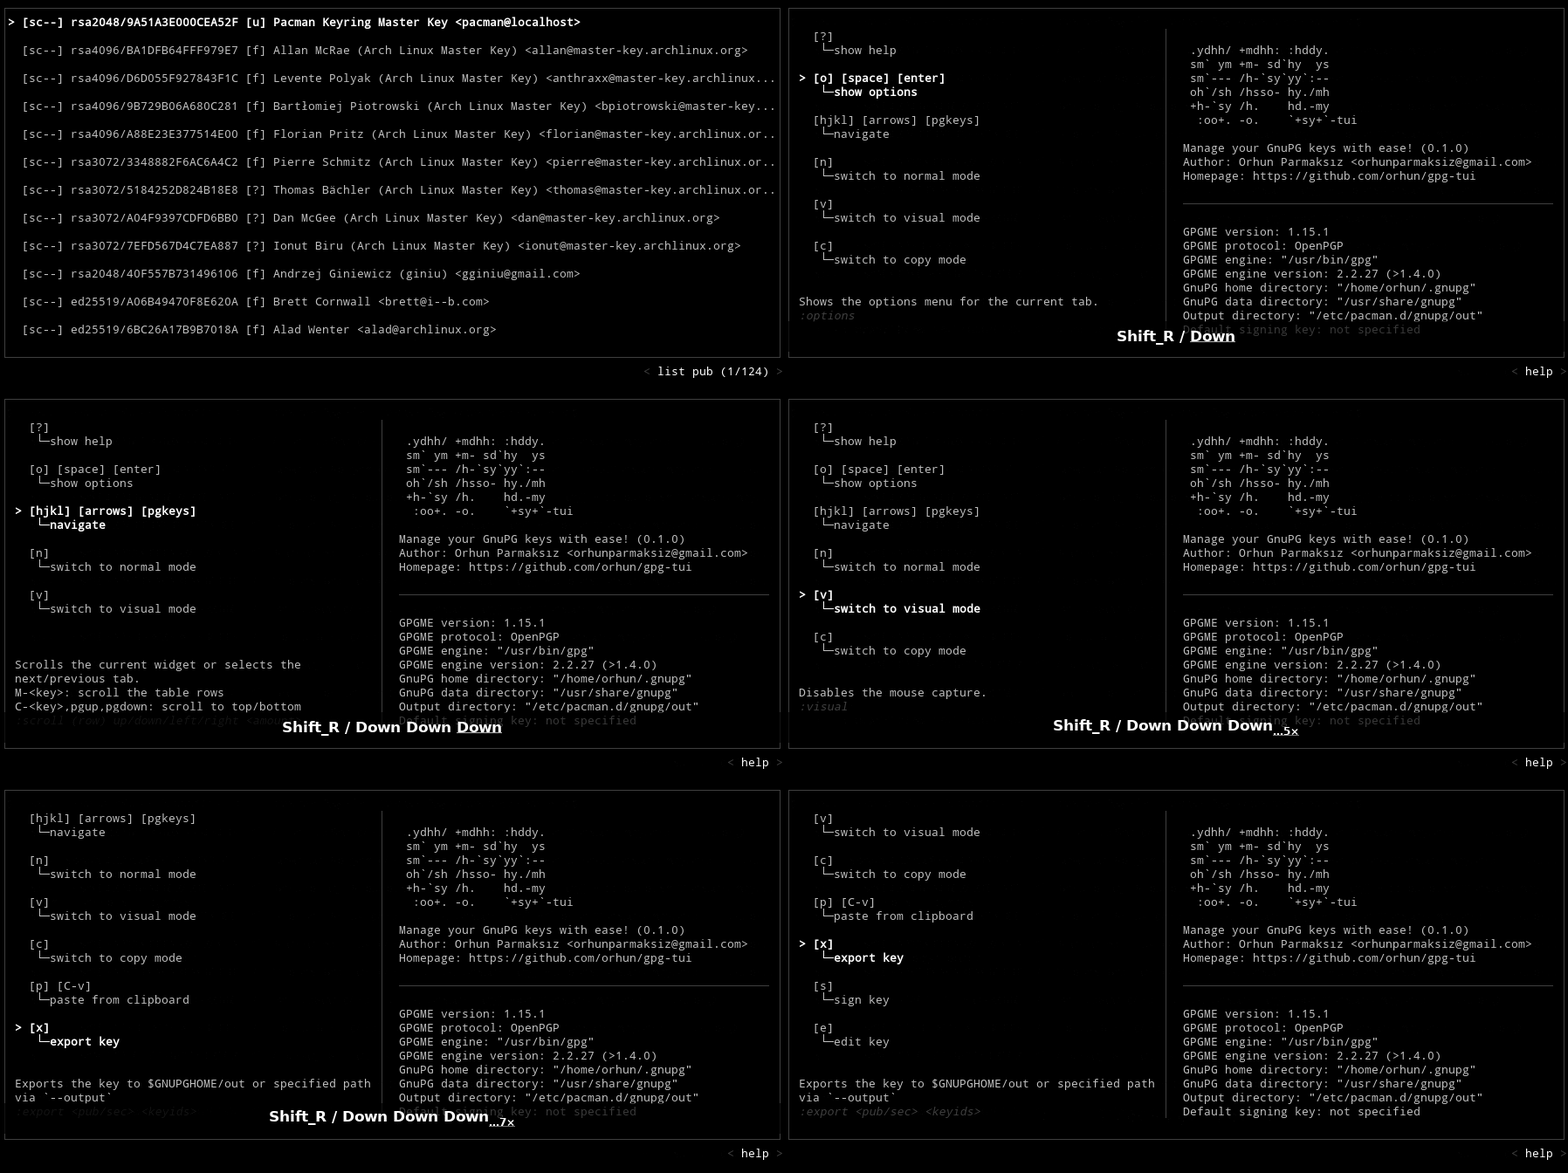
User Interface
Scrolling
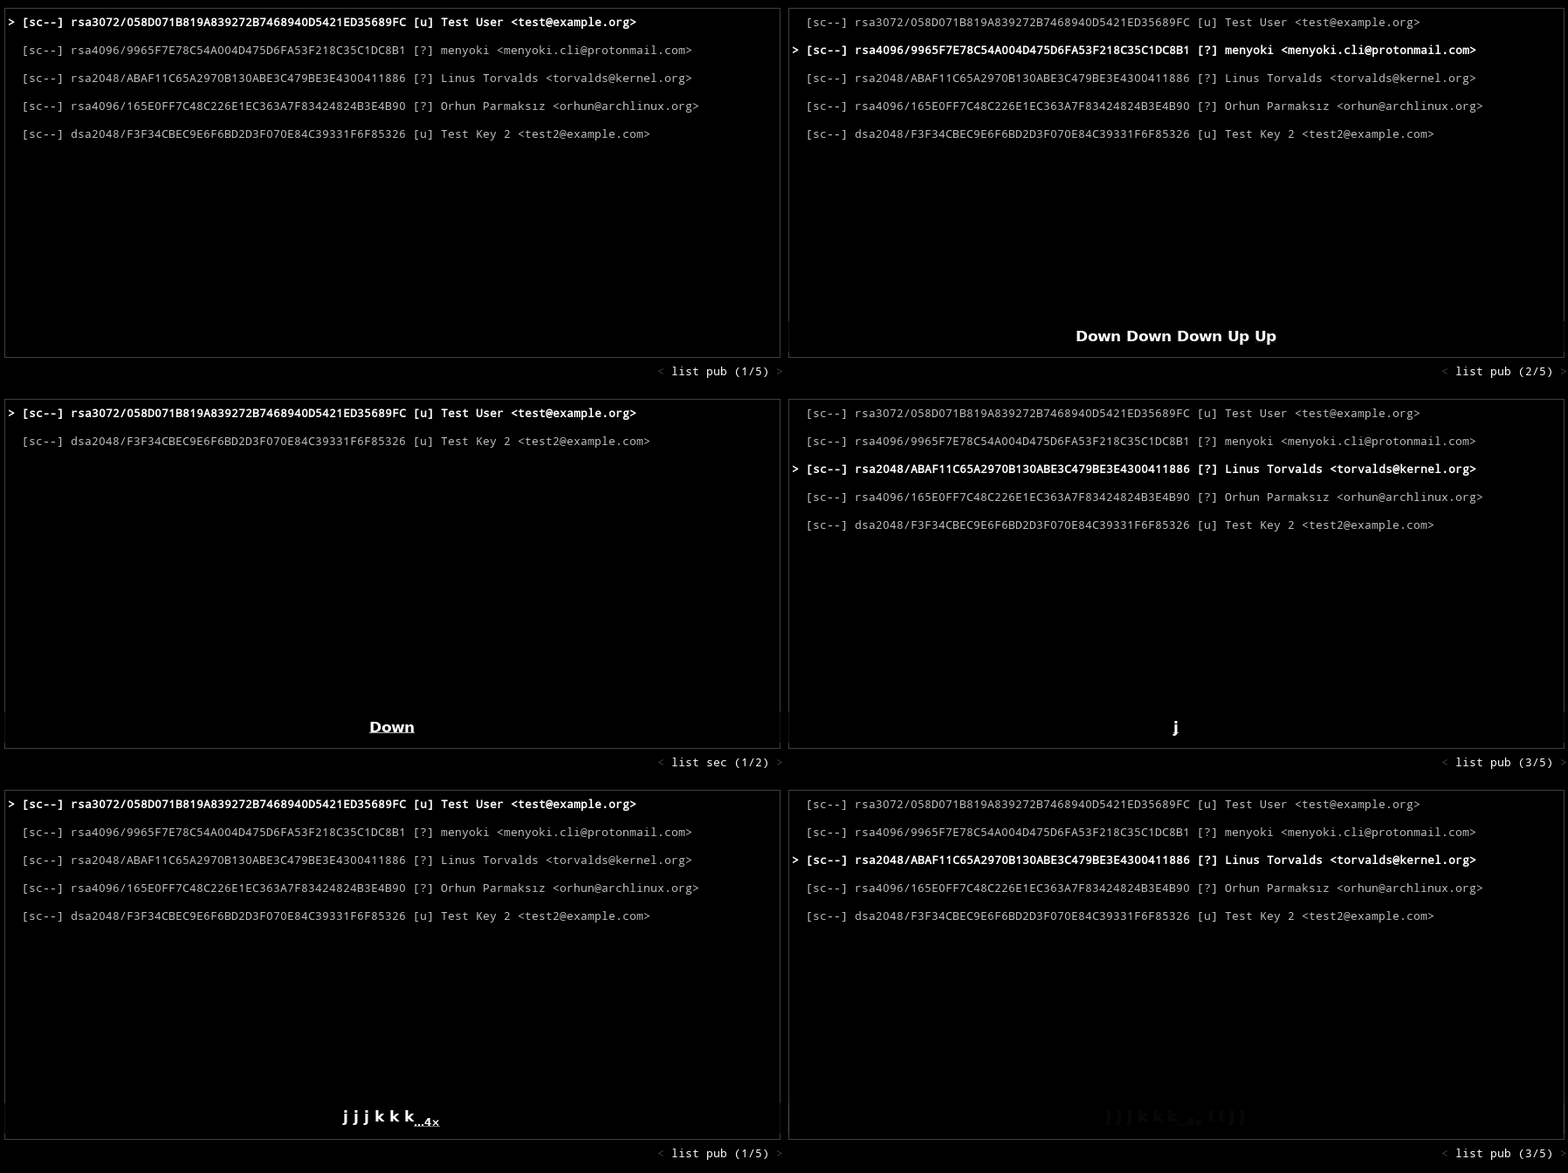
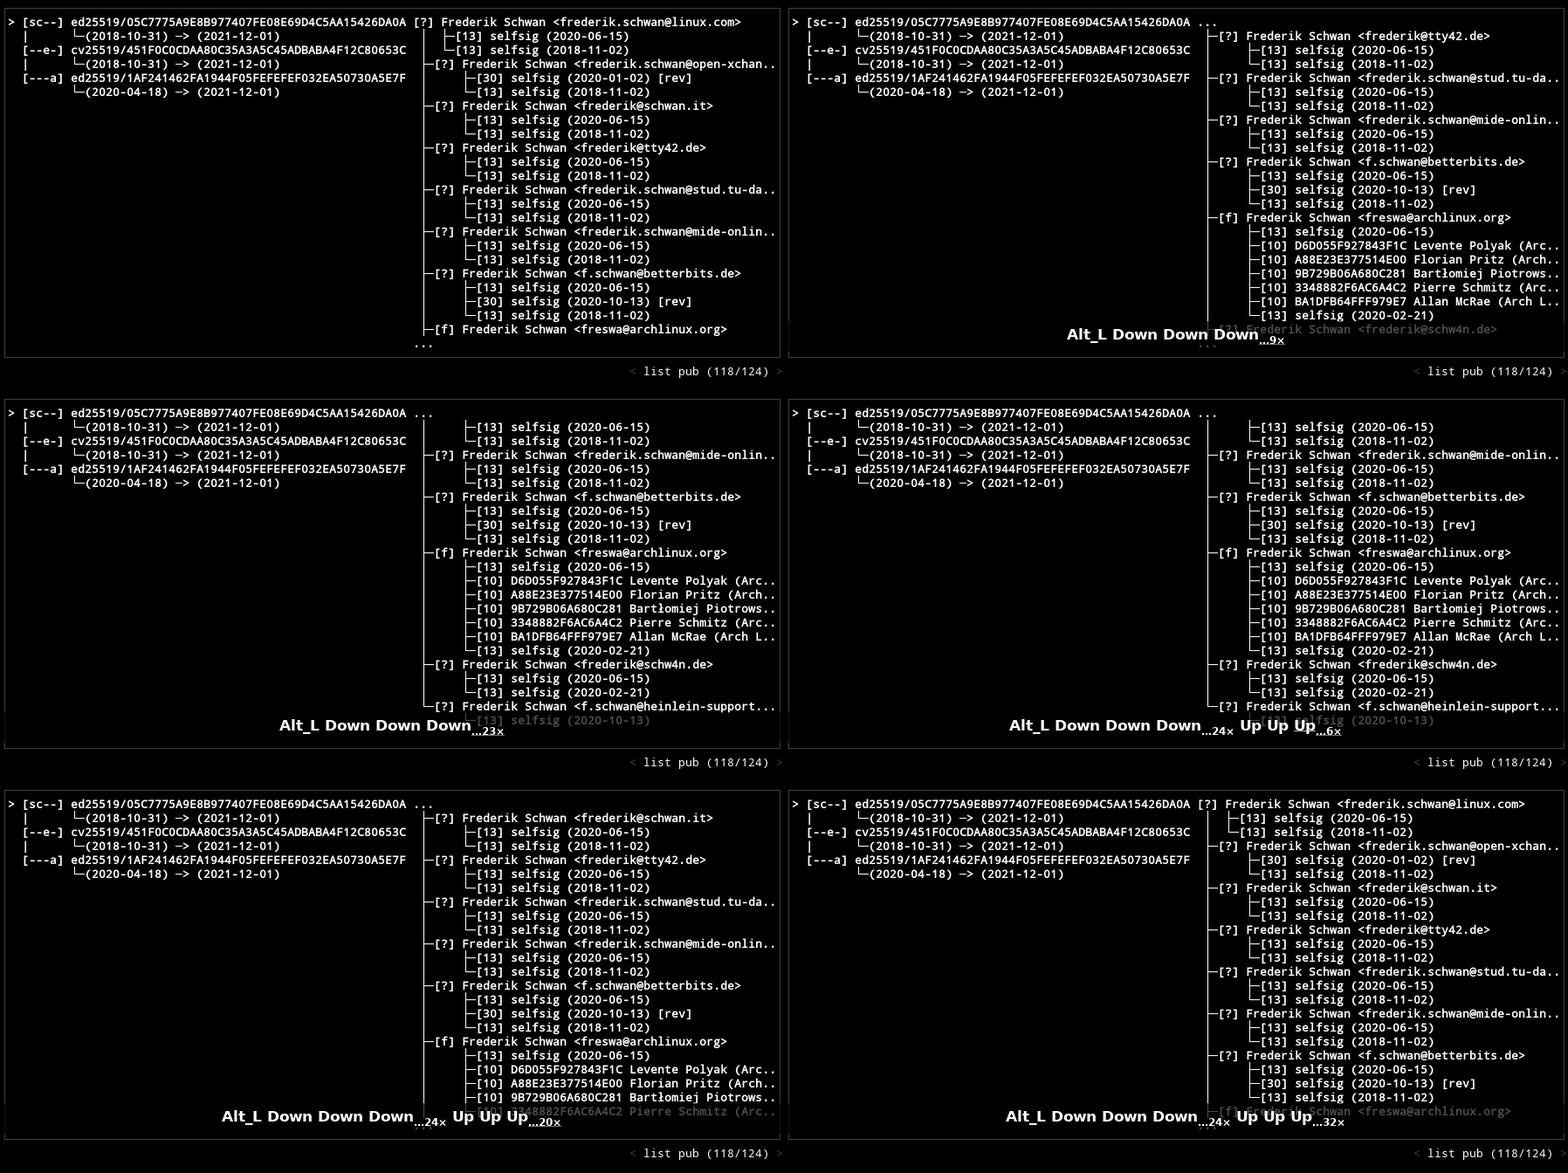
Use arrow or hjkl keys to scroll and navigate through lists/menus/tabs. Additionally, you can use Ctrl-Up/Down combinations or PageUp/PageDown keys to scroll to the top/bottom.
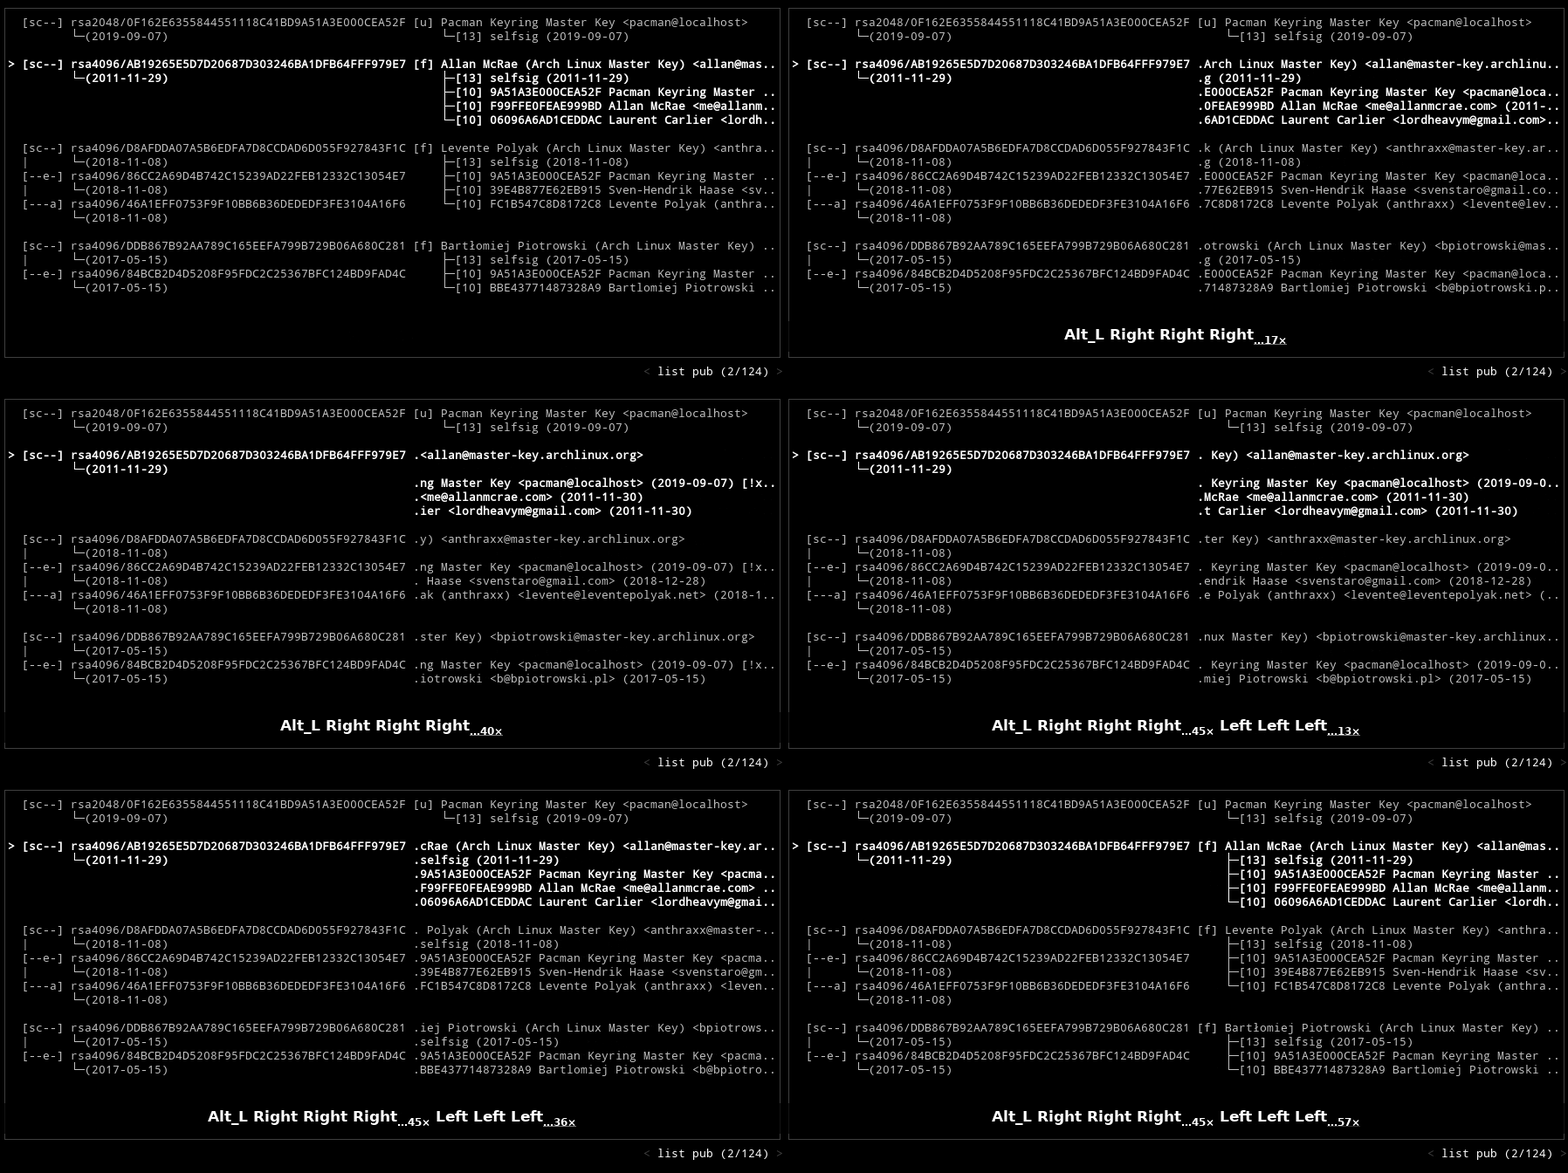
If rows are not fitting on the terminal interface, use Alt + arrow/hjkl keys to individually scroll them.
Options Menu
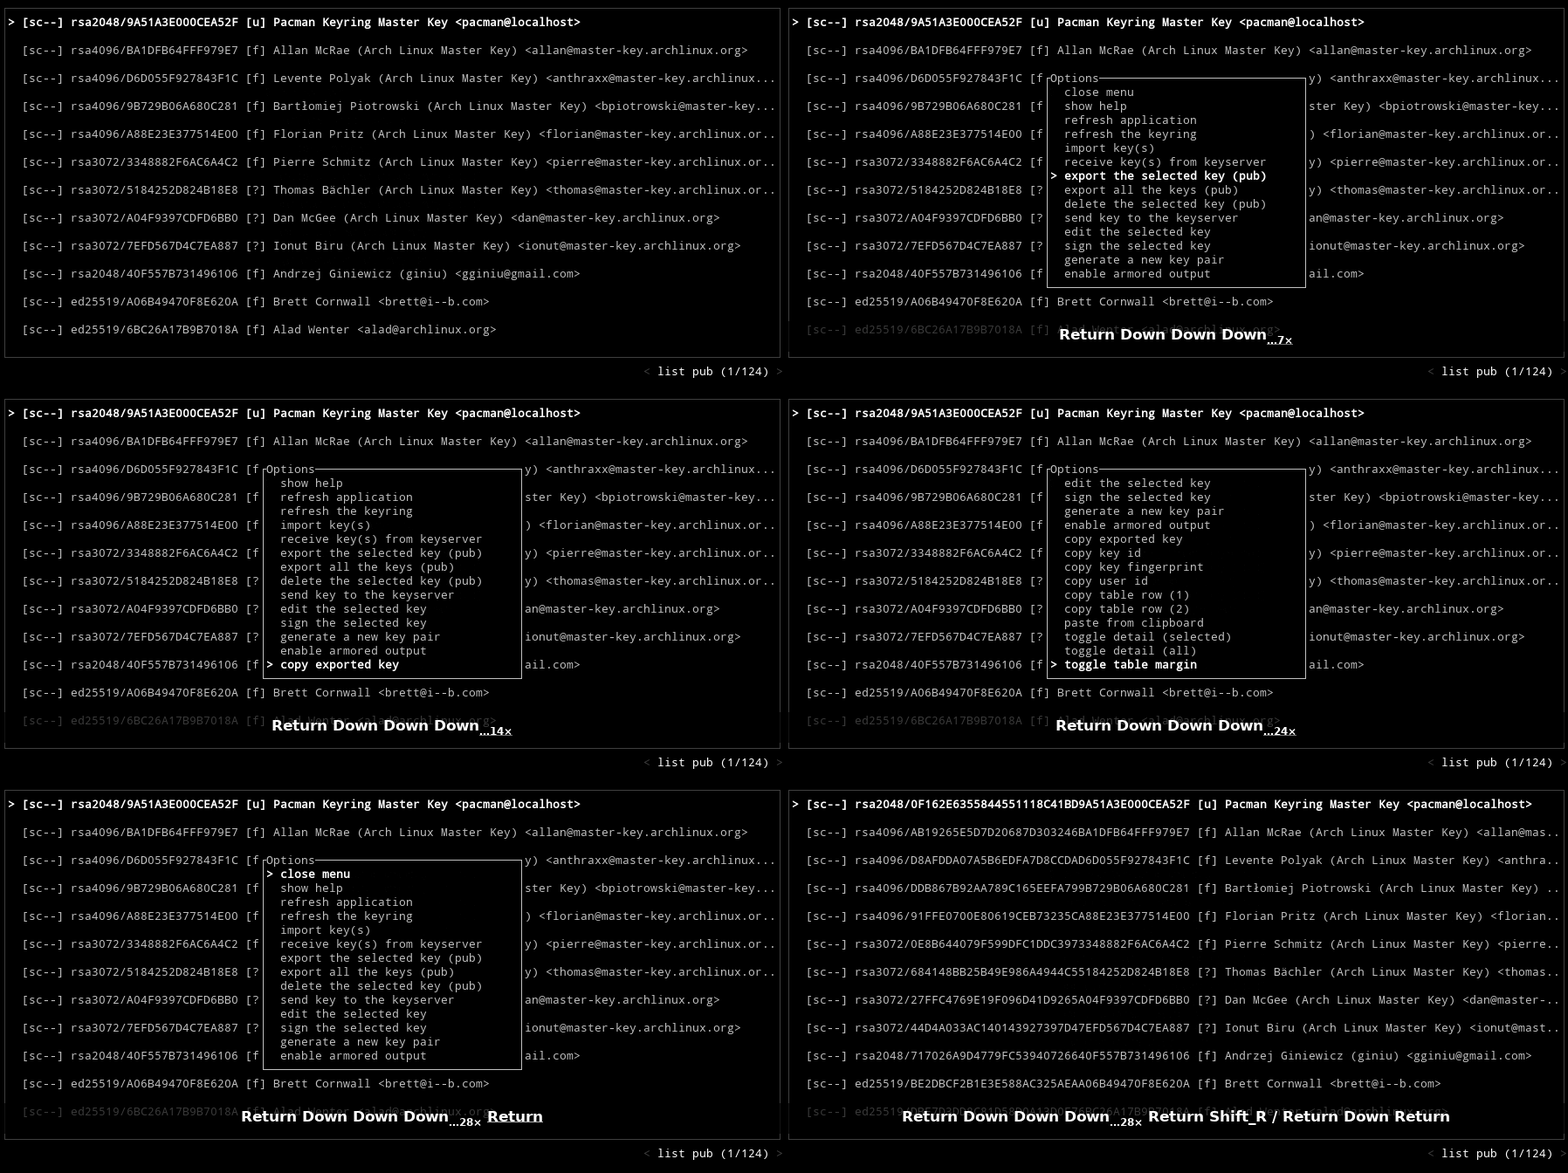
Most of the actions can be performed using the options menu. Simply press Enter and select what you want to do.
Copy / Paste
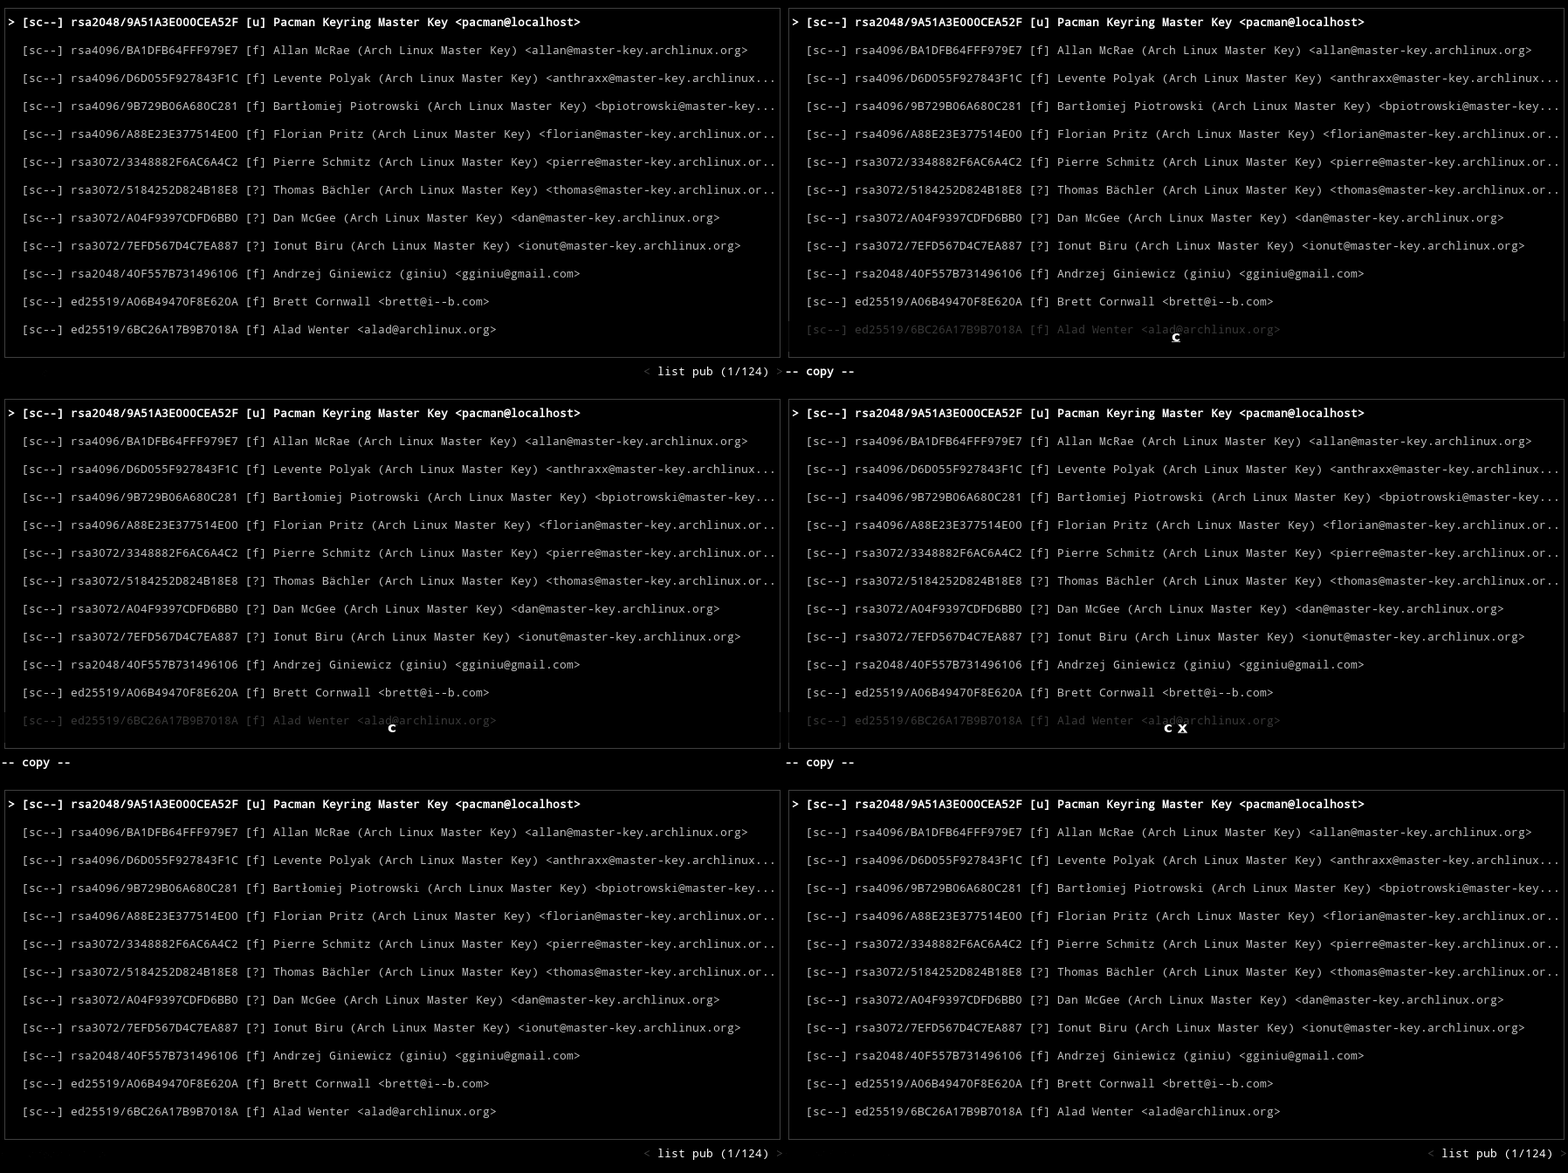
There's a copy mode for making it easier to copy particular values to the clipboard. To use this mode, press c followed by one of the key bindings:
x: Copy the exported keyi: Copy the key idf: Copy the key fingerprintu: Copy the user id1,2: Copy the content of the row
Then the value will be copied to the clipboard and the application mode will be reverted to normal.
Press ESC or n to cancel and switch to normal mode during this operation.
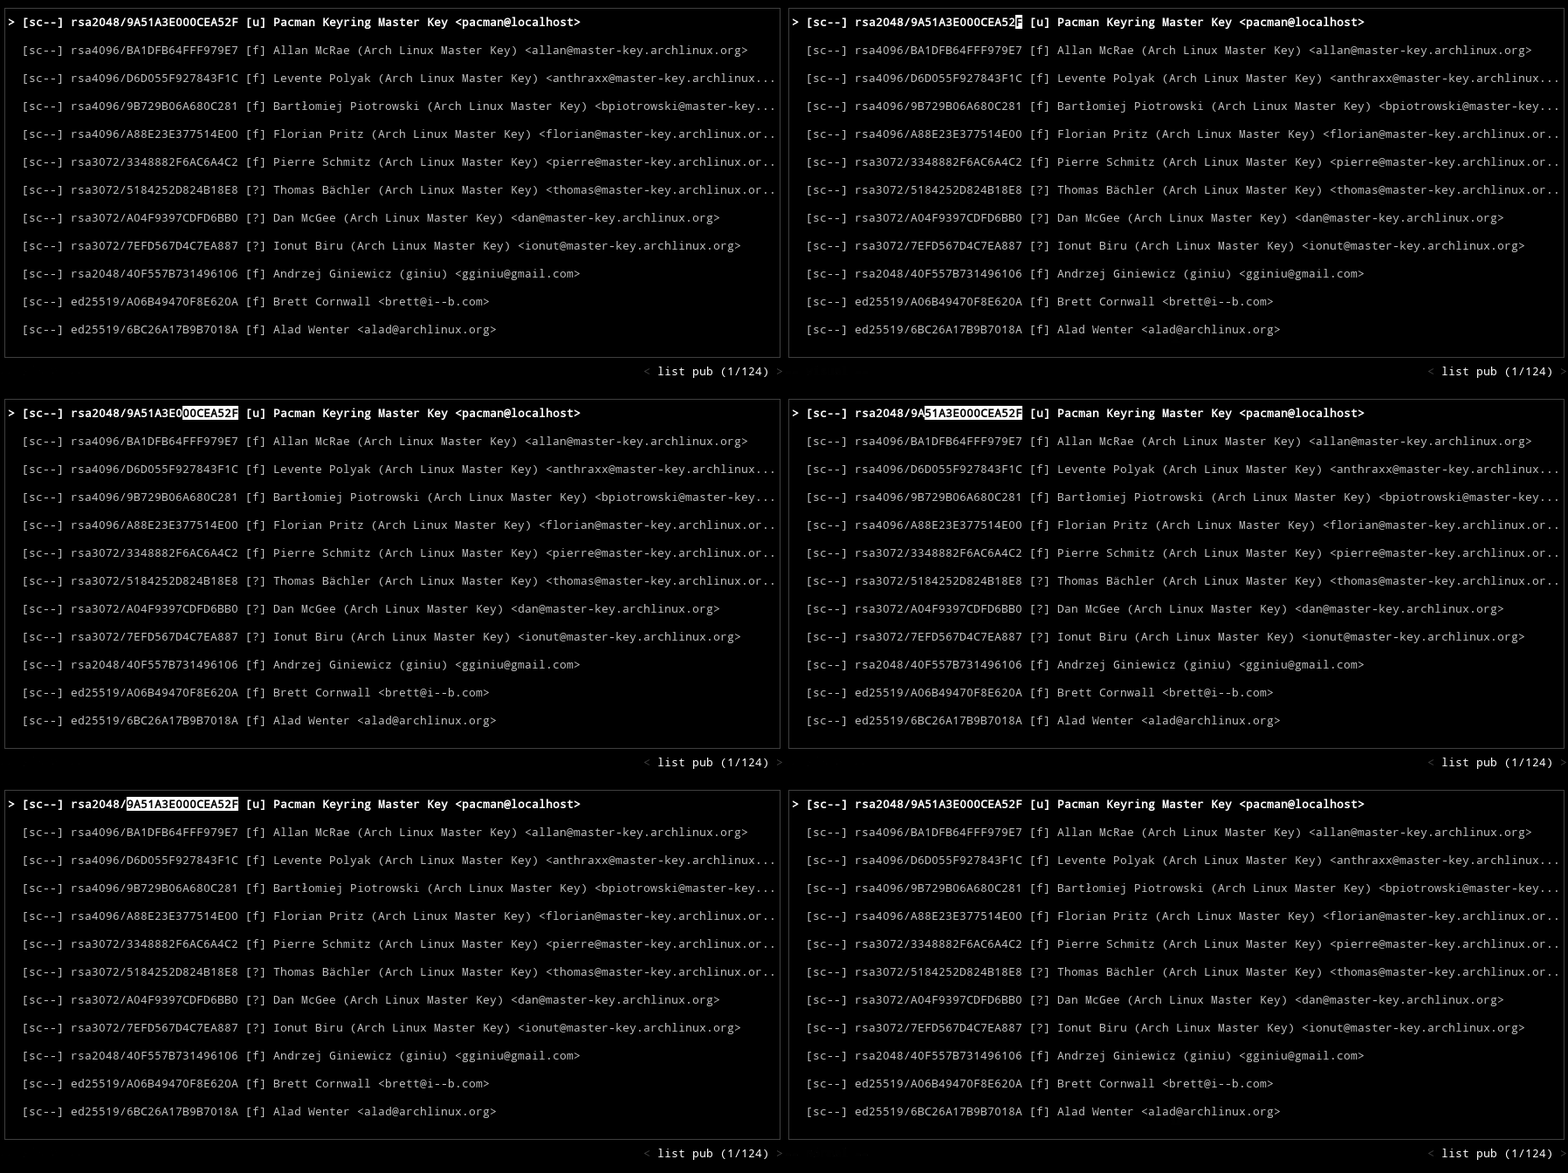
Instead of copying values with copy mode, you can use the visual mode which disables the mouse capture. It means that you can select/highlight the text on the interface and copy as you do normally.
visual mode can be used for other purposes such as scrolling via mouse.
Selection Mode
In the selection mode, key bindings that are responsible for showing the options menu (e.g. enter) are used for exiting the user interface and printing out the selection to the standard output. This is useful when you want to use gpg-tui in conjunction with shell commands/other tools.
For switching to the selection mode, use the --select argument as follows:
gpg-tui --select <option>
<option> might be one of the following:
key: Exported keykey-id: Key IDkey-fingerprint: Key fingerprintuser-id: User IDrow<n>: Contents of the nth row

For example, you can use the following shell function to encrypt a file for the selected recipient (key ID):
function encrypt() { gpg -e -r $(gpg-tui --select key-id) "$@"; }
Detailed View
Press Tab to toggle the detail level for the selected entry in the list. Number keys (e.g. 1, 2, 3) can be also used to set a specific level.

Press t to toggle the detail level for all entries in the list.

There are couple a of different modes for the size of the tables which changes the details that each entry shows. You can use the m key for switching to different modes.

Search
Press / to search for a value from the currently shown table.

File explorer
Some of the key management operations such as importing keys optionally use a file explorer utility. As default, gpg-tui uses xplr if the xplr binary is installed on the system. To change which utility is going to be used, --file-explorer argument can be used or it can be specified in the configuration file.
gpg-tui --file-explorer "fzf --color dark"
Show logs
To view the log messages, press ctrl-l. It will bring up a pane in the TUI for analyzing the logs:

This pane consists of two parts. Left is the target selector and on the right side the logging messages view scrolling up.
The target selector controls:
- Capturing of log messages by the logger.
- Selection of levels for display in the logging message view.
The two columns have the following meaning:
- Code
EWIDT:Estands for Error,Wfor Warn, and similarly Info, Debug and Trace.- Inverted characters (EWIDT) are enabled log levels in the view.
- Normal characters show enabled capturing of a log level per target.
- If any of EWIDT are not shown, then the respective log level is not captured.
This logger pane has the following key bindings and they are only activated while the logs are being shown:
| Key | Action |
|---|---|
h | toggles target selector widget hidden/visible |
f | toggle focus on the selected target only |
up | select previous target in target selector widget |
down | select next target in target selector widget |
left | reduce SHOWN (!) log messages by one level |
right | increase SHOWN (!) log messages by one level |
- | reduce CAPTURED (!) log messages by one level |
+ | increase CAPTURED (!) log messages by one level |
pageup | enter Page Mode and scroll approx. half page up in log history |
pagedown | only in page mode: scroll 10 events down in log history |
escape | exit page mode and go back to scrolling mode |
space | toggles hiding of targets, which have logfilter set to off |
For saving the logs to a file, you can use the --log-file argument:
gpg-tui --log-file gpg-tui.log
RUST_LOG environment variable can be used to set the log level accordingly.
RUST_LOG=debug gpg-tui
Running commands
Every operation on the terminal interface is handled implicitly by the application-specific commands. So it's possible to do certain things by switching to command mode with pressing : and running commands. (similar to Vim)
For example,
:list pub-> list public keys:set armor true-> enable armored output
A full list of commands can be found here.

Also you can switch between command mode and search by pressing Tab.

Key Management
List
Available keys in the keyring are listed on a table as default. They can be scrolled or the listing type (public/secret keys) can be changed by changing the tab via arrow keys.
See the approach section for more information about the meaning of the table rows.

Export
Press x to export the selected key to a file. The default output directory is $GNUPGHOME/out and can be changed by either using --homedir or --outdir argument.
Additionally, you can enable/disable armored output by pressing a.

Also, you can export the secret subkeys by using the options menu:

Sign
Press s to sign the selected key with the default secret key. This key can be specified with --default-key argument or using the options menu.
This feature uses gpg fallback and runs gpg --sign-key command.

Edit
Press e to edit the selected key.
This feature uses gpg fallback and runs gpg --edit-key command. It presents a menu that provides a list of options to change the key details. See the edit-key documentation for more information.

Import/Receive
Import operation uses a file explorer for selecting the key(s) to import. Press i to launch the file explorer (defaults to xplr), and select the key file(s) to import:

If a file explorer is not specified or installed, import operation is done by using the :import command. So press i to switch to command mode (which will automatically add the import command) and then give it your file(s) to import.

You can also import keys from clipboard using :import-clipboard command or the options menu.

Similar to import, receive operation is also done by using a command which is :receive. So press f (for fetching keys from a keyserver) and give it your key ID(s).
This feature uses gpg fallback and runs gpg --receive-keys command.

Send
Press u (for uploading to the keyserver) followed by y (for confirmation) to send the selected key to the default keyserver.

Generate
Press g to generate a new key pair.
This feature uses gpg fallback and runs gpg --full-generate-key command. It presents dialogs for all of the generation options.

Delete
Press Backspace followed by y (for confirmation) to delete the selected key from the keyring.

Refresh
Press Ctrl-y for refreshing the keyring.
This feature uses gpg fallback and runs gpg --refresh-keys command.

Styling
You can customize the look of gpg-tui to get rid of its boring and minimalistic vibe. (!)
Colors
To enable colors, you can specify a style with --style argument or press Ctrl-S while running for toggling the style. Currently, only one style is supported which is colored.
gpg-tui --style colored

If the default accent color of the interface causes problems with your theme or if you just want to change it to something more vivid, you can use --color argument to specify another color in HEX format.
gpg-tui --style colored --color 507030

To disable colors:
gpg-tui --style plain
Alternatively, you can set the NO_COLOR environment variable.
Splash screen
There is a splash screen that shows the project's logo for a couple of seconds if --splash flag is present. It's purely cosmetical.
gpg-tui --splash

To enable colors for the splash screen, use the colored style.
gpg-tui --splash --style colored

Roadmap
Platforms
gpg-tui is tested on Linux systems during the development phase. It should be tested on other platforms such as Microsoft Windows and macOS and found issues should be reported for future compatibility with these platforms.
Packaging

gpg-tui should be more and easily accessible for other platforms/distributions. Thus, it should be packaged for package managers such as Homebrew and APT. If you're a packager and want to contribute, feel free to submit an issue or start a discussion!
Command-Line Fallback
Some of the features of gpg-tui require the execution of the CLI program gpg in order to operate. This is due to the fact that designing a TUI for the menus that gpg already provides is redundant and time-consuming. Also, in case these menus will change in the future, it is better to rely on the gpg rather than implementing these options using GPGME. On the other hand, gpg has some commands that GPGME doesn't directly provide. (e.g --refresh-keys) So it is more convenient to utilize gpg for these cases.
The plan for the future of gpg-tui is utilizing gpg when it is necessary, depending on whether if it is more convenient for the user.
Key Management Only
gpg-tui only aims to do key management for now, although it can do much more utilizing GPGME and/or gpg. It's due to the design choice and also for setting the boundaries of the project.
Resources
About the project
- Code of Conduct
- Contribution Guidelines
- Changelog
- List of Commands
External links
- GnuPG Documentation
- Understanding PGP/GPG Key Server Output
- What is the meaning of GnuPG's --list-sigs output?
In the media
- Hacker News
- heise online - IT-News
Contact


Funding
If you find gpg-tui and/or other projects on my GitHub profile useful, consider supporting me on GitHub Sponsors or becoming a patron!


License
The MIT License
Copyright
Copyright © 2021-2026, Orhun Parmaksız
Related repositories
Windows Terminal is Microsoft's open-source terminal application, developed in the microsoft/terminal GitHub repository (MIT license) alongside the original Windows Console Host. It adds tabs, rich text, globalization, configurable profiles, and theming on top of the console infrastructure the same repo maintains, and can be installed from the Microsoft Store, GitHub Releases, winget, or the unofficial Chocolatey and Scoop packages.
trimstray/the-book-of-secret-knowledge is a highly-starred GitHub repository offering a curated collection of resources for system and network administrators, DevOps, pentesters, and security researchers, though it aims to be useful for everyone. It compiles inspiring lists, manuals, cheatsheets, blogs, hacks, one-liners, and CLI/web tools, organized into main chapters such as CLI Tools, GUI Tools, Systems/Services, Networks, Hacking/Penetration Testing, and Shell One-liners. The project emphasizes quality over quantity, welcoming contributions that are inviting, clear, not tiring, and useful, with an active RSS feed for updates.
yt-dlp is a Python command-line downloader that pulls audio and video from thousands of sites and hands post-processing off to ffmpeg. It's a fork of youtube-dl built for people who want fast fixes when a site breaks, not a polished app.
#1 PDF Application on GitHub that lets you edit PDFs on any device anywhere
Quick answers
How active is development on orhun/gpg-tui?
The most recent commit recorded on orhun/gpg-tui was 3 days ago, based on the GitHub push timestamp. The repository has 50 forks — one of the better signals of community interest.
How does orhun/gpg-tui compare to other Developer Tools projects?
orhun/gpg-tui is tracked by TopGit in the Developer Tools category, with 1.8k GitHub stars and written in Rust. Browse the Developer Tools topic page on TopGit to compare it against similar projects by stars and activity.
How many stars does orhun/gpg-tui have?
orhun/gpg-tui has 1.8k GitHub stars — refresh the page for the live number, or check github.com/orhun/gpg-tui. TopGit mirrors GitHub's count but does not claim minute-by-minute accuracy.
Is orhun/gpg-tui open source?
Yes — orhun/gpg-tui ships under the MIT license, which makes its source code freely readable (and, depending on license terms, forkable and reusable). Source: github.com/orhun/gpg-tui.
What is orhun/gpg-tui?
orhun/gpg-tui (orhun/gpg-tui) is a Rust project on GitHub. From the project's own README: Manage your GnuPG keys with ease! 🔐
Where do I read more about orhun/gpg-tui?
This TopGit page is a snapshot — the READ ME tab shows the project's own README content (links stripped, images preserved). The GitHub repository at github.com/orhun/gpg-tui is the definitive source.
Read full README in the tab above.
Is gpg-tui worth your time?
ChatGPT, Claude and Perplexity can all read this page. Ask one of them what it makes of gpg-tui.