TopGit tracks Experience-Monks/jam3-lesson-webgl-shader-threejs on GitHub. The project has 365 stars. Using custom vertex and fragment shaders in ThreeJS
Snapshot summary built from the project's own GitHub metadata — there's no written TopGit review yet. The page will update automatically when a full review is published.
WHY NO REVIEW YET
TopGit writes full reviews for the most-starred, most-requested repositories. This page is a snapshot until then — see the READ ME tab for the original README in full.
In this lesson, we'll learn how to apply Fragment and Vertex shaders to a ThreeJS mesh in WebGL. Make sure you read webgl-shader-intro first to understand the basics of GLSL.
Contents
Why ThreeJS?
Setup
Code Overview
Mesh & Shader Materials
Step 1: Your First Shader
Attributes
Uniforms
Projecting the Vertex
Step 2: Distance from Center
Step 3: Visualizing Normals
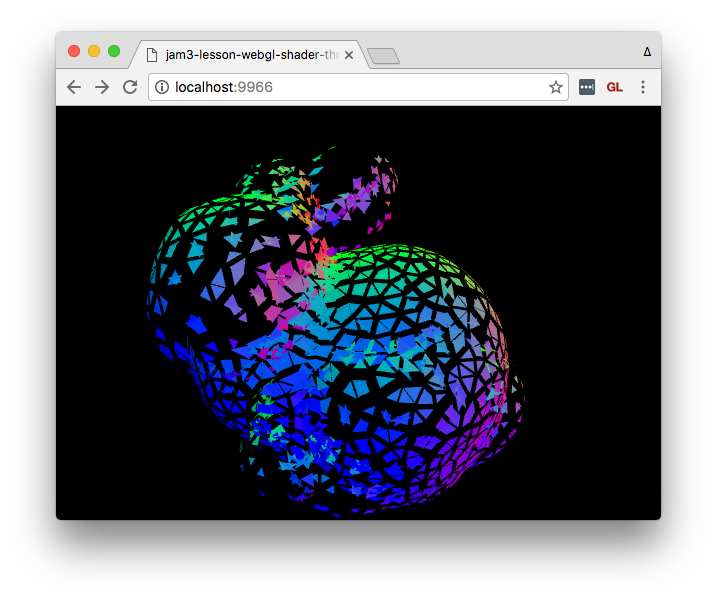
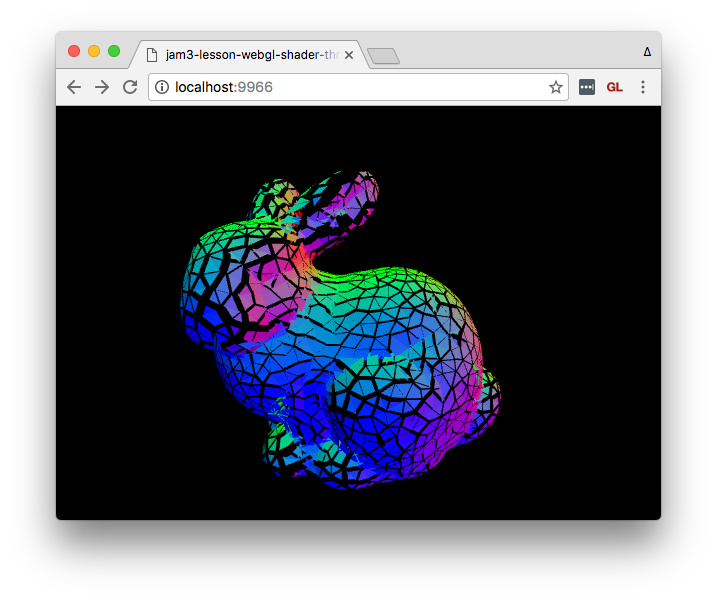
Step 4: Exploding Triangles
Step 5: Animation
Appendix: ShaderMaterial vs RawShaderMaterial
Why ThreeJS?
Writing raw WebGL involves a lot of boilerplate and adds a great deal of complexity. Instead, we will use ThreeJS to provide a layer of convenience and abstraction, and also to ease ourselves into more advanced ThreeJS lessons.
This lesson will be easier if you already have some basic experience with ThreeJS Scene, Camera, WebGLRenderer etc.
Setup
You can download ThreeJS directly from the site, but for our purposes we will use npm and budo for a faster development workflow.
:bulb: If you haven't used npm or budo, see our lesson Modules for Frontend JavaScript for more details.
First, you should clone this repo and install the dependencies:
git clone https://github.com/Jam3/jam3-lesson-webgl-shader-threejs.git

# move into directory
cd jam3-lesson-webgl-shader-threejs

# install dependencies
npm install

# start dev server
npm run start
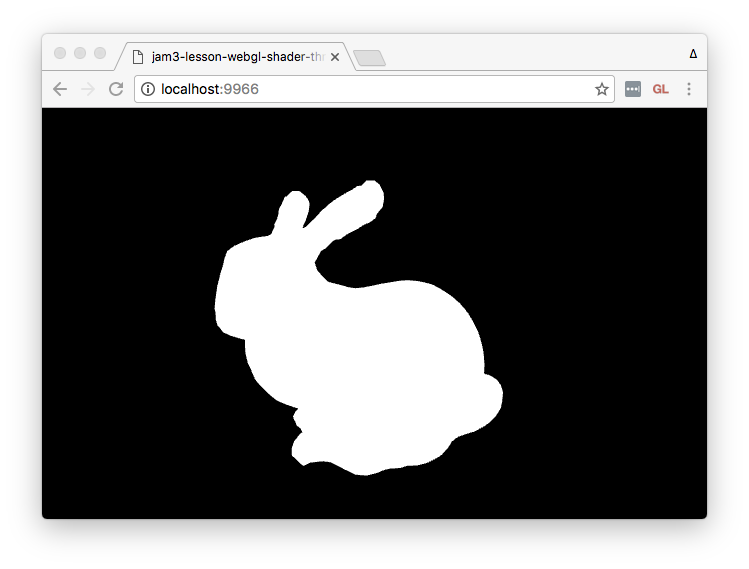
Now you should be able to open http://localhost:9966/ to see a white bunny.
This project uses Babel through babelify (a browserify transform). It also uses brfs, which can statically inline files like shaders.
Code Overview
The code is split into a few different files:
./lib/index.js
This holds the "guts" of our demo, creating our application, geometry, mesh, and render loop. Since it is the root file, we use this to ensure the THREE global can be accessed from other files:
global.THREE = require('three');
./lib/createApp.js
This boilerplate creates a basic ThreeJS application using a helper module, orbit-controls, for 3D camera movement.
You can review the code in this file, but it won't be essential to this lesson.
./lib/createBunnyGeometry.js
This helper method creates a ThreeJS geometry from a mesh primitive, in this case a 3D bunny.
For the purpose of this lesson, you can skip over this file.
./lib/shader.frag
This is the fragment shader which you will be editing in this lesson.
./lib/shader.vert
This is the fragment shader which you will be editing in this lesson.
./lib/reference/
Here you can find some shader references for each step in this lesson.
Mesh & Shader Materials
In ThreeJS, a Mesh is the basic building block for rendering 3D shapes. It is made up of a Geometry (often re-used for memory) and a Material. For example, this code adds a red cube to the scene:
const geometry = new THREE.BoxGeometry(1, 1, 1);
const material = new THREE.MeshBasicMaterial({ color: 'red' });
const mesh = new THREE.Mesh(geometry, material);
scene.add(mesh);
In our ./lib/index.js, we have some similar code that sets up a 3D bunny geometry:
// Get a nicely prepared geometry
const geometry = createBunnyGeometry({ flat: true });
Next, we create a material for the bunny.
We use a RawShaderMaterial, which is a special type of material that accepts vertexShader and fragmentShader strings. We are using brfs, a source transform, so that we can keep our shaders as separate files and inline them at bundle-time.
The initial shader provided with this repo just renders the 3D mesh with a flat white material. It's a good idea to always start with a basic shader before you dive into other effects.
Vertex Shader
The vertex shader at ./lib/shader.vert looks like this:
Fragment and vertex shaders require a main() function — it gets called by WebGL for each vertex (or fragment) in our mesh.
This vertex shader introduces two new concepts: attributes and uniforms.
Attributes
A vertex shader runs on each vertex in a geometry. A vertex can contain various attributes, such as Position (XYZ), UV coordinates (XY), Normal (XYZ), etc. The attributes are set up in JavaScript, and end up as read-only inputs to our vertex shader.
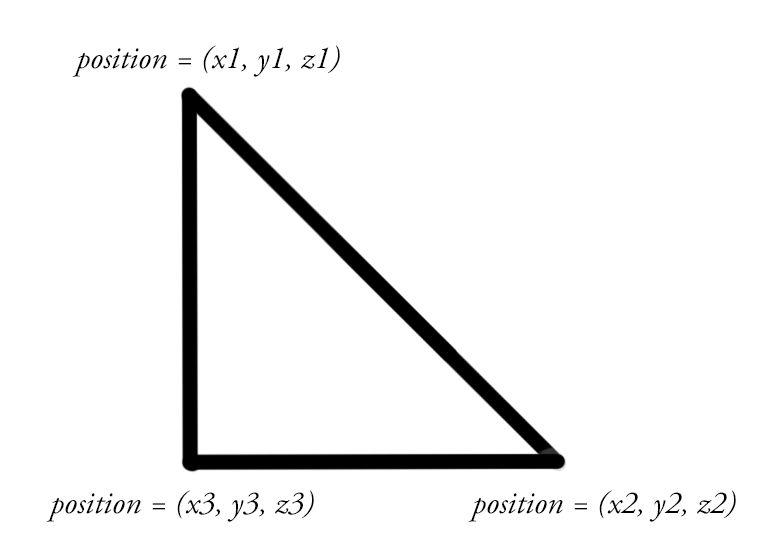
For example, the triangle below has 3 vertices, each vertex has one attribute that holds the XYZ position. For this triangle, the vertex shader would be executed 3 times by the GPU.
Our bunny vertex shader only has one attribute for the vertex position.
attribute vec3 position;
Uniforms
Vertex and fragment shaders can also have uniforms, which is a constant value across all triangles (or fragments) in a render call. This value, set from JavaScript, is read-only in the vertex and fragment shaders.
For example, we could use a uniform to define a constant RGB color for our mesh.
ThreeJS provides a few built-in uniforms for shaders, such as the following 4x4 matrices, as mat4 data types:
projectionMatrix — used to convert 3D world units into 2D screen-space.
viewMatrix — an inverse of our PerspectiveCamera's world matrix
modelMatrix — the model-space matrix of our Mesh
modelViewMatrix — a combination of the view and model matrix
:bulb: If you aren't familiar with matrices, don't fret! We plan to cover the basics of vector math in a later lesson.
If you use one of these, you will need to define it like so:
The role of the vertex shader is to turn our 3D data (e.g. position) into features that WebGL's rasterizer can use to fill our shapes on a 2D screen. This is known as "projecting" 3D world coordinates into 2D screen-space coordinates.
:bulb: It's not yet necessary to understand why 1.0 is used as the w component in position. If you are curious, you can read more here.
The above could also be written a little differently, by specifying vec4 for the attribute (WebGL will expand vectors with w=1.0 by default) and multiplying each matrix independently.
The first line, with precision, defines the floating point precision the GPU should use by default for all floats. When using RawShaderMaterial, you will need to specify this at the top of your fragment shaders. You can use lowp, mediump, or highp, but typically highp is recommended.
:bulb: The default precision for vertex shaders is highp, so we didn't need to define it earlier.
Then, we have gl_FragColor, which is a builtin write-only vec4 for the output color. You should always write all 4 channels to this in your fragment shader. In our case, we are using pure white: (1.0, 1.0, 1.0, 1.0). This is similar to ShaderToy's fragColor variable.
Step 2: Distance from Center
Reference: shader2.vert, shader2.frag
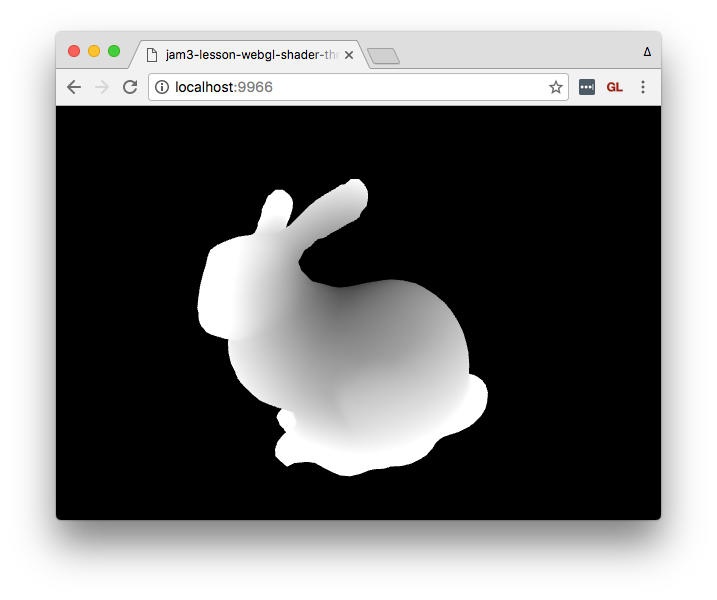
Next, we'll apply a radial gradient to our mesh by coloring each pixel based on its XYZ distance from world center, (0, 0, 0).
You can edit your shader.vert and shader.frag to see the new changes locally.
This shader introduces a new concept: varyings. This is a write-only value that will get passed down the pipeline to the fragment shader. Here, we take the magnitude of the position vector, i.e. compute its distance from origin vec3(0.0).
:bulb: You can also use the distance built-in, like so:
In a fragment shader, varyings are read-only. They are inputs from the vertex shader. Their values are interpolated between vertices, so if you have a 0.0 float coming from one vertex, and 1.0 coming from another, each fragment will end up with some values in-between.
In our case, the fragment RGB color is set to the distFromCenter, which gives us values that are black near the world origin, and more white as the vertices move away from this point.
Step 3: Visualizing Normals
Reference: shader3.vert, shader3.frag
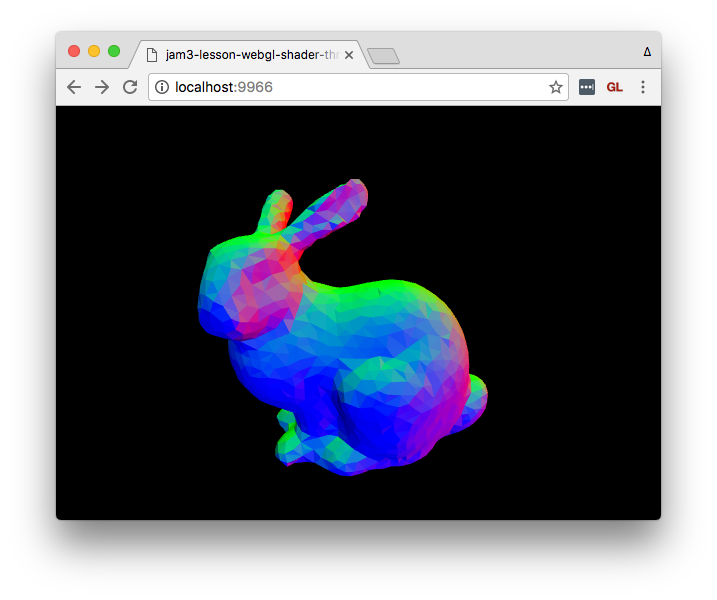
In this step, we visualize the normals of the mesh. This is a new attribute, already specified in createBunnyGeometry.js, that defines the way each triangle points away from the center. Normals are often used in surface lighting and other effects.
A normal is a unit vector, which means its components are normalized to the range -1.0 to 1.0.
Here, we simply render the passed vNormal for each fragment. It ends up looking nice, even though some values will be clamped because they are less than 0.0.
:bulb: The geometry in index.js is created with { flat: true }, which means the normals should be separated. You can try toggling that to see how it looks with combined (smooth) normals.
Step 4: Exploding Triangles
Reference: shader4.vert, shader4.frag
Now, let's push each triangle along its face normal to create an explosion effect! :fire:
In this shader, we offset each vertex position by a vector. In this case, we use the normal to know which direction the position should be offset, and a dist scalar to determine how far away the triangles should be pushed.
We can leave the fragment shader unchanged.
Step 5: Animation
Reference: shader5.vert, shader5.frag
Lastly, we'll animate the explosion by adding a uniform to the shader material.
This needs to be set up from JavaScript, so make sure our index.js defines a uniforms option in the material:
Above, we define a time uniform (which will be accessed by that name in the shader), give it a float type (ThreeJS uses 'f' — see here for others), and provide a default value.
Then, our render loop increments the value every frame, and changes the value field of our time uniform.
// Time since beginning
let time = 0;
// Start our render loop
createLoop((dt) => {
// update time
time += dt / 1000;
// set value
material.uniforms.time.value = time;
// render
...
}).start();
Vertex Shader
attribute vec4 position;
attribute vec3 normal;
uniform mat4 projectionMatrix;
uniform mat4 modelViewMatrix;
uniform float time;
varying vec3 vNormal;
void main () {
vNormal = normal;
vec4 offset = position;
// Animate between 0 and 1
// sin(x) returns a value in [-1...1] range
float dist = sin(time) * 0.5 + 0.5;
offset.xyz += normal * dist;
gl_Position = projectionMatrix * modelViewMatrix * offset;
}
In this shader, we first define our uniform before our main function. Since it's a uniform, it will be the same value for all vertices in that render call.
uniform float time;
We can use the built-in sin() function (equivalent to Math.sin in JavaScript), which gives us back a value from -1.0 to 1.0. Then we normalize it into 0 to 1 range, so that our mesh is always exploding outward:
float dist = sin(time) * 0.5 + 0.5;
Voilà! We have an exploding bunny! :rabbit:
Appendix: ShaderMaterial vs RawShaderMaterial
At some point you may wonder why ThreeJS has both ShaderMaterial and RawShaderMaterial. Typically I suggest using RawShaderMaterial since it is less error-prone, but it means you have to be a bit more verbose and manually specify precision, extensions, etc.
Instead, you can use ShaderMaterial and skip some definitions, such as ThreeJS's built-in attributes, uniforms and fragment shader precision:
Does Experience-Monks/jam3-lesson-webgl-shader-threejs have a project website?
No homepage URL was recorded for Experience-Monks/jam3-lesson-webgl-shader-threejs in TopGit's last sync. The README tab above frequently contains screenshots and demo links, or check the repository description on GitHub.
How many stars does Experience-Monks/jam3-lesson-webgl-shader-threejs have?
Experience-Monks/jam3-lesson-webgl-shader-threejs has 365 GitHub stars — refresh the page for the live number, or check github.com/Experience-Monks/jam3-lesson-webgl-shader-threejs. TopGit mirrors GitHub's count but does not claim minute-by-minute accuracy.
Is Experience-Monks/jam3-lesson-webgl-shader-threejs open source?
Yes — Experience-Monks/jam3-lesson-webgl-shader-threejs ships under the MIT license, which makes its source code freely readable (and, depending on license terms, forkable and reusable). Source: github.com/Experience-Monks/jam3-lesson-webgl-shader-threejs.
What is Experience-Monks/jam3-lesson-webgl-shader-threejs?
Experience-Monks/jam3-lesson-webgl-shader-threejs (Experience-Monks/jam3-lesson-webgl-shader-threejs) is a JavaScript project on GitHub. From the project's own README: Using custom vertex and fragment shaders in ThreeJS
Where do I read more about Experience-Monks/jam3-lesson-webgl-shader-threejs?
This TopGit page is a snapshot — the READ ME tab shows the project's own README content (links stripped, images preserved). The GitHub repository at github.com/Experience-Monks/jam3-lesson-webgl-shader-threejs is the definitive source.
Read full README in the tab above.
Is jam3-lesson-webgl-shader-threejs worth your time?
ChatGPT, Claude and Perplexity can all read this page. Ask one of them what it makes of jam3-lesson-webgl-shader-threejs.
 /jam3-lesson-webgl-shader-threejs