On GitHub, marmelab/shadcn-admin-kit has picked up 1.1k stars, TypeScript. Component kit to build your Admin app with shadcn/ui
Snapshot summary built from the project's own GitHub metadata — there's no written TopGit review yet. The page will update automatically when a full review is published.
WHY NO REVIEW YET
TopGit writes full reviews for the most-starred, most-requested repositories. This page is a snapshot until then — see the READ ME tab for the original README in full.
A component kit to build your Admin app with shadcn/ui.
Features
CRUD: working List, Show, Edit and Create pages
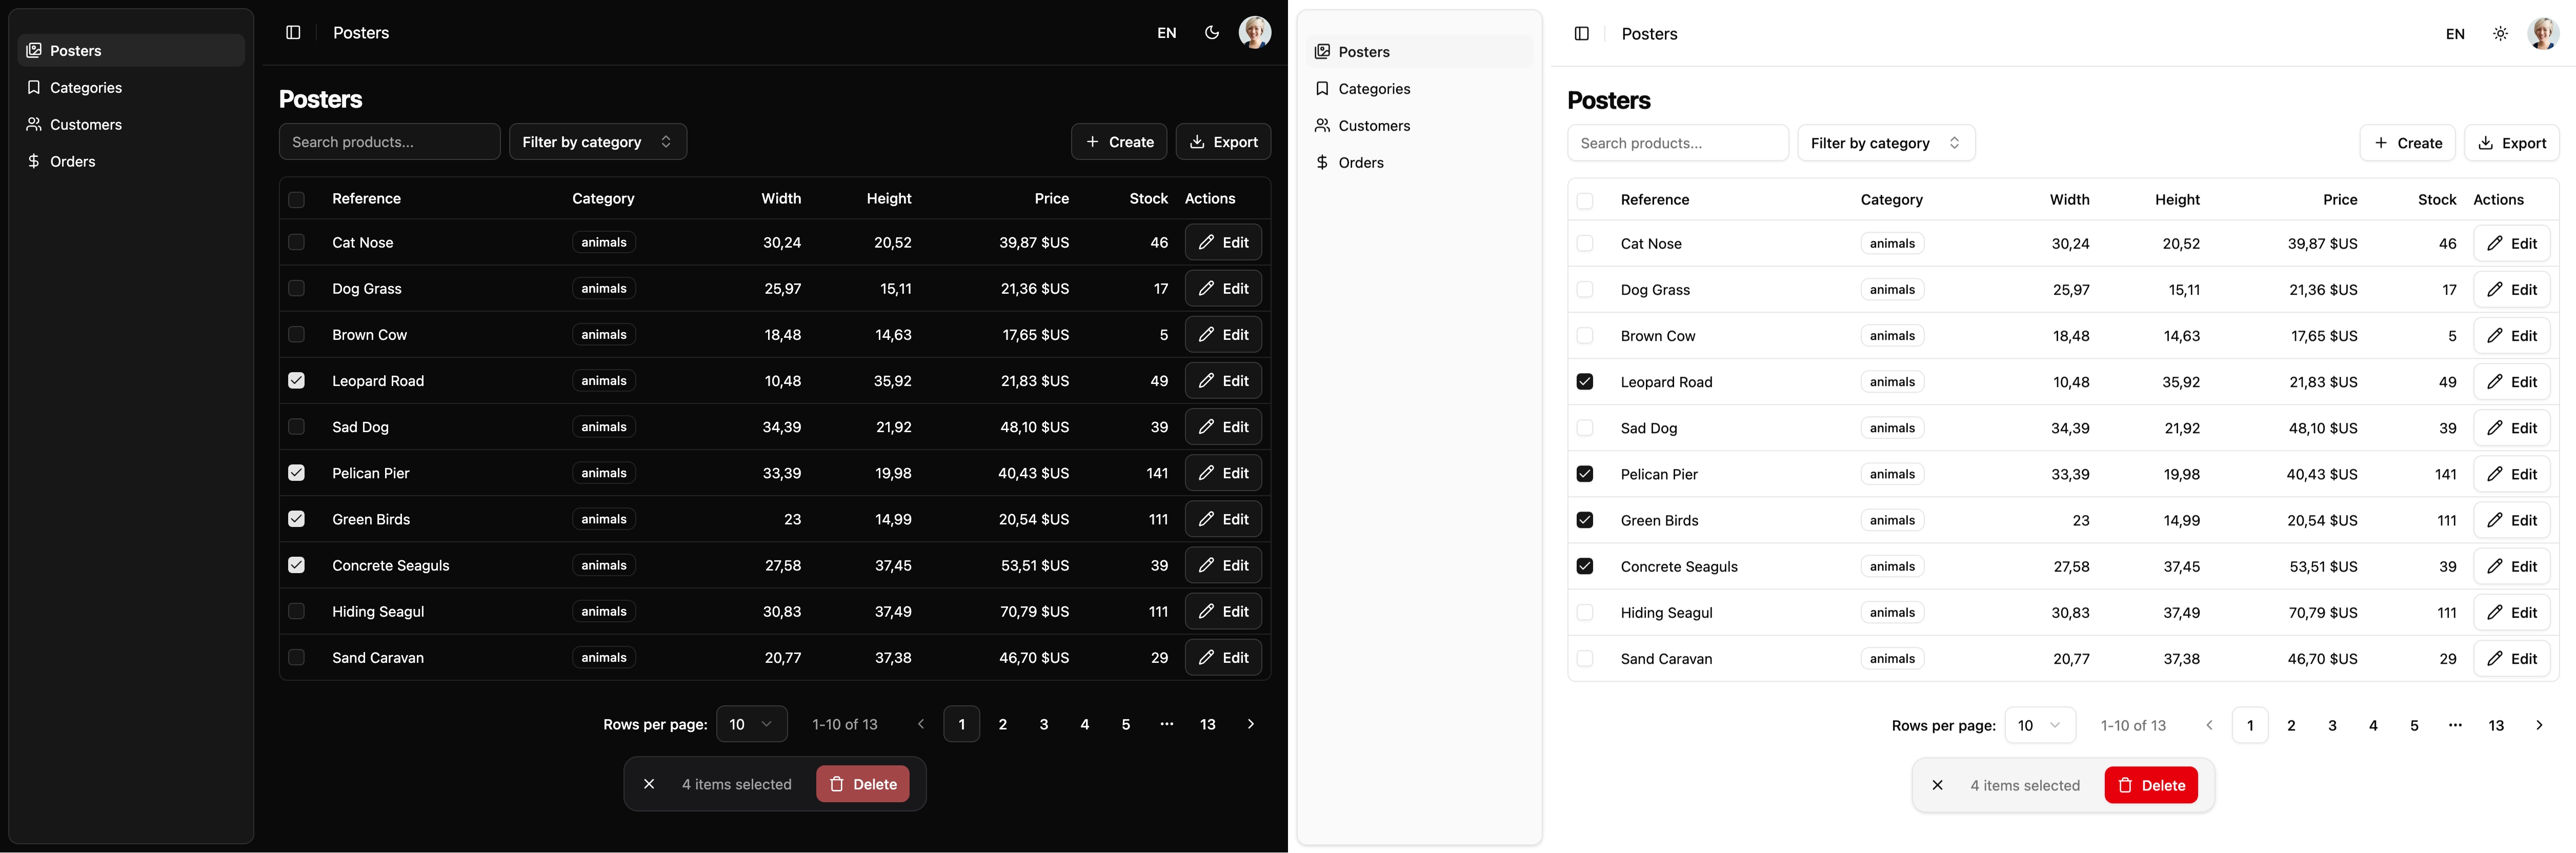
Data Table with sorting, filtering, export, bulk actions, column selection, and pagination
Form components with data binding and validation
View and edit references (one-to-many, many-to-one)
Sidebar menu
Login, auth check & access control (compatible with any authentication backend)
Dashboard page
Scaffold the code based on the API response, using Guessers
i18n support
Light/dark mode
Responsive
Accessible
Compatible with any API (REST, GraphQL, etc.)
Works with Vite.js, Remix, Netx.js, and more
Tech Stack
UI: shadcn/ui & Base UI
Styling: Tailwind CSS
Icons: Lucide
Routing: React Router
API calls: TanStack Query
Forms & Validation: React Hook Form
Admin Framework: Ra-Core
Type safety: TypeScript
Getting started
Check the Quick Start Guide for a step-by-step guide to set up your first Admin app with shadcn-admin-kit.
Exploring Components
shadcn-admin-kit provides a set of components that you can use to build your Admin app. The components are organized in the src/components/admin directory, and you can find the documentation for each component in its respective file.
Usage
Read the documentation to learn how to use shadcn-admin-kit in your project. The following sections provide a brief overview of the main concepts.
Use <Admin> As Root Component
The entry point of your application is the <Admin> component. It allows to configure the application adapters, routes, and UI.
You'll need to specify a Data Provider to let the Admin know how to fetch data from your API. A Data Provider is an abstraction that allows you to connect your Admin to any API, whether it's REST, GraphQL, or any other protocol. You can choose from any of the 50+ Data Providers, and you can even build your own.
The following example uses a simple REST adapter called ra-data-simple-rest:
import { Admin } from "@/components/admin/admin";
import simpleRestProvider from 'ra-data-simple-rest';

const dataProvider = simpleRestProvider('http://path.to.my.api');

export const App = () => (
  <Admin dataProvider={dataProvider}>
    {/* Resources go here */}
  </Admin>
);
Declare Resources
Then, you'll need to declare the routes of the application. shadcn-admin-kit allows to define CRUD routes (list, edit, create, show), and custom routes. Use the <Resource> component from ra-core (which was automatically added to your dependencies) to define CRUD routes.
For each resource, you can specify a name (which will map to the API endpoint) and the list, edit, create and show components to use.
If you don't know where to start, you can use the built-in guessers to configure the admin for you! The guessers will automatically generate code based on the data returned by your API.
import { Resource } from "ra-core";
import simpleRestProvider from 'ra-data-simple-rest';
import { Admin } from "@/components/admin/admin";
import { ListGuesser } from "@/components/admin/list-guesser";
import { ShowGuesser } from "@/components/admin/show-guesser";
import { EditGuesser } from "@/components/admin/edit-guesser";

const dataProvider = simpleRestProvider('http://path.to.my.api');

export const App = () => (
  <Admin dataProvider={dataProvider}>
    <Resource
      name="posts"
      list={ListGuesser}
      edit={EditGuesser}
      show={ShowGuesser}
    />
  </Admin>
);
The guessers will print out the guessed component code in the console. You can then copy and paste it into your code to create the components to use as list, edit and show view.
// Example output
Guessed List:

import { DataTable } from "@/components/admin/DataTable";
import { List } from "@/components/admin/List";

export const CategoryList = () => (
    <List>
        <DataTable>
            <DataTable.Col source="id" />
            <DataTable.Col source="name" />
        </DataTable>
    </List>
);
Adding Authentication
You can configure authentication in your Admin by using the authProvider prop. There are many authProviders you can choose from, and you can also build your own.
Once your authProvider is set up, you can pass it to the authProvider prop, and the <Admin> component will automatically display the login page when the user is not authenticated.
import { Resource } from "ra-core";
import simpleRestProvider from 'ra-data-simple-rest';
import { Admin } from "@/components/admin/admin";
import { ListGuesser } from "@/components/admin/list-guesser";
import { authProvider } from './authProvider';

export const App = () => (
  <Admin
    dataProvider={simpleRestProvider('http://path.to.my.api')}
    authProvider={authProvider}
  >
    <Resource
      name="posts"
      list={ListGuesser}
    />
  </Admin>
);
Adding a Dashboard
You can add a dashboard to your Admin by using the dashboard prop. The dashboard can be any React component.
To register your own routes, pass one or several <CustomRoutes> elements as children of <Admin>. Declare as many react-router <Route> as you want inside them.
// in src/App.tsx
import { Resource, CustomRoutes } from 'ra-core';
import { Route } from "react-router";
import { Admin } from "@/components/admin/admin";

import { dataProvider } from './dataProvider';
import posts from './posts';
import comments from './comments';
import { Settings } from './Settings';
import { Profile } from './Profile';

export const App = () => (
    <Admin dataProvider={dataProvider}>
        <Resource name="posts" {...posts} />
        <Resource name="comments" {...comments} />
        <CustomRoutes>
            <Route path="/settings" element={<Settings />} />
            <Route path="/profile" element={<Profile />} />
        </CustomRoutes>
    </Admin>
);
Now, when a user browses to /settings or /profile, the components you defined will appear in the main part of the screen.
Tip: Custom routes don’t automatically appear in the menu. You'll need to customize the <AppSidebar> component if you want custom routes to be accessible from the menu.
Contributing
This project requires Node.js and pnpm.
To install the dependencies, run:
make install
To serve the demo locally, run:
make run
To start the storybook, run:
make storybook
To build the project, run:
make build
To test the UI registry, run:
make test-registry
License
This project is licensed under the MIT License, courtesy of Marmelab.
How many stars does marmelab/shadcn-admin-kit have?
marmelab/shadcn-admin-kit has 1.1k GitHub stars — refresh the page for the live number, or check github.com/marmelab/shadcn-admin-kit. TopGit mirrors GitHub's count but does not claim minute-by-minute accuracy.
Is marmelab/shadcn-admin-kit open source?
Yes — marmelab/shadcn-admin-kit ships under the MIT license, which makes its source code freely readable (and, depending on license terms, forkable and reusable). Source: github.com/marmelab/shadcn-admin-kit.
What is marmelab/shadcn-admin-kit?
marmelab/shadcn-admin-kit (marmelab/shadcn-admin-kit) is a TypeScript project on GitHub. From the project's own README: Component kit to build your Admin app with shadcn/ui
Where can I see marmelab/shadcn-admin-kit in action?
The project maintains a homepage at http://marmelab.com/shadcn-admin-kit/. The README tab on this page also usually contains screenshots and a quickstart.
Where do I read more about marmelab/shadcn-admin-kit?
This TopGit page is a snapshot — the READ ME tab shows the project's own README content (links stripped, images preserved). The GitHub repository at github.com/marmelab/shadcn-admin-kit is the definitive source.
Read full README in the tab above.
Still deciding about shadcn-admin-kit?
One click hands the question to an AI along with this page — see what it says about shadcn-admin-kit.

 /shadcn-admin-kit