101 GitHub stars and counting — rwaldron/galileo-io is a JavaScript project TopGit is tracking across repositories on the platform. Intel Galileo & Intel Edison IO Plugin for Johnny-Five
Snapshot summary built from the project's own GitHub metadata — there's no written TopGit review yet. The page will update automatically when a full review is published.
WHY NO REVIEW YET
TopGit writes full reviews for the most-starred, most-requested repositories. This page is a snapshot until then — see the READ ME tab for the original README in full.
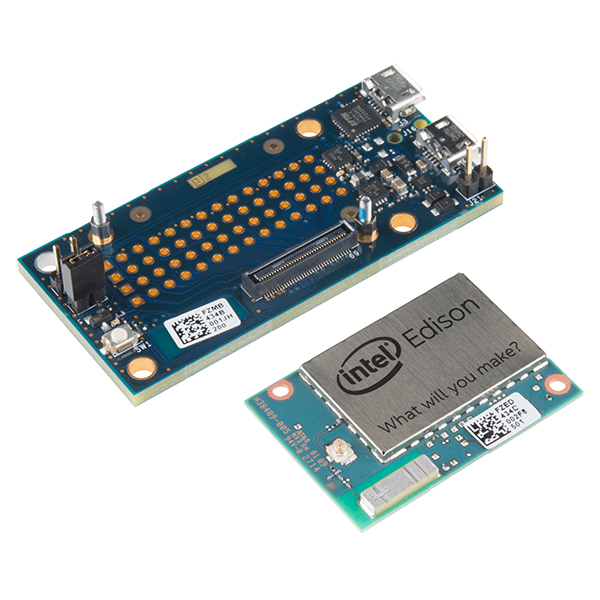
Compatible with Intel's Galileo Generation 2 (no longer supports Galileo Generation 1), Edison (Mini and Arduino Board, SparkFun GPIO & Arduino Blocks, Xadow Board, DFRobot Romeo & IO Expansion) and Joule boards.
Galileo/Edison/Joule-IO is a Firmata.js-compatibility class for writing Node.js programs that run on the Intel Galileo, Intel Edison, or Intel Joule. This project was built at Bocoup
Getting Started
Galileo/Edison/Joule-IO scripts are run directly on the Galileo, Edison or Joule board. To get started, complete the appropriate setup instructions:
Getting Started with the Intel Galileo Board
Get Started with the Intel Edison Development Board
Intel Joule Module User Guide
Installation
npm install galileo-io johnny-five
If you want, you can also use the alias modules:
For Edison:
npm install edison-io johnny-five
For Joule:
npm install joule-io johnny-five
But keep in mind that these modules only delegate directly back to this module.
Usage
This module is intended for use as an IO-Plugin for Johnny-Five.
Pin Identity and Access by Platform
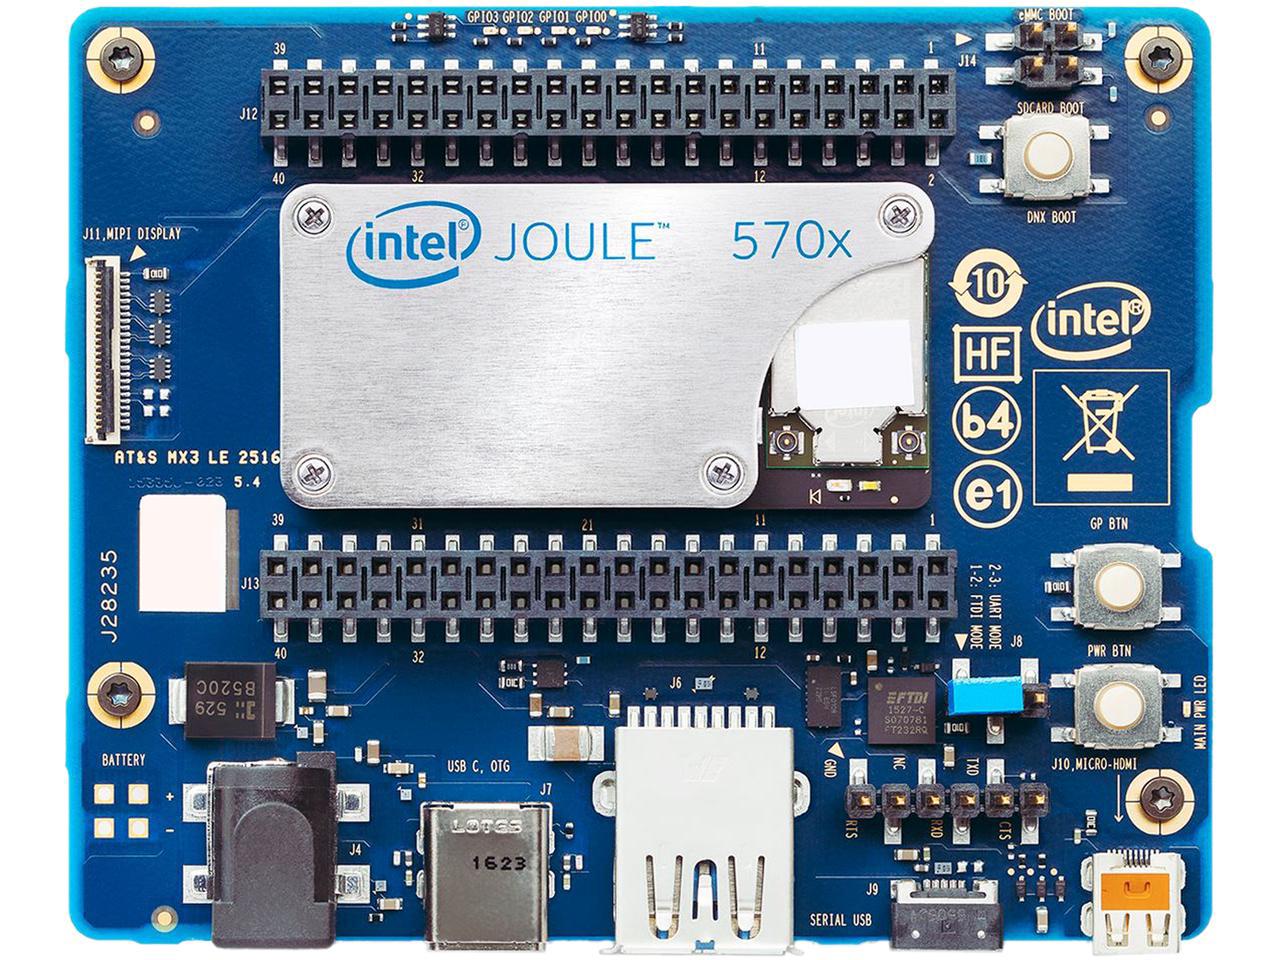
Intel Joule (Carrier Board)
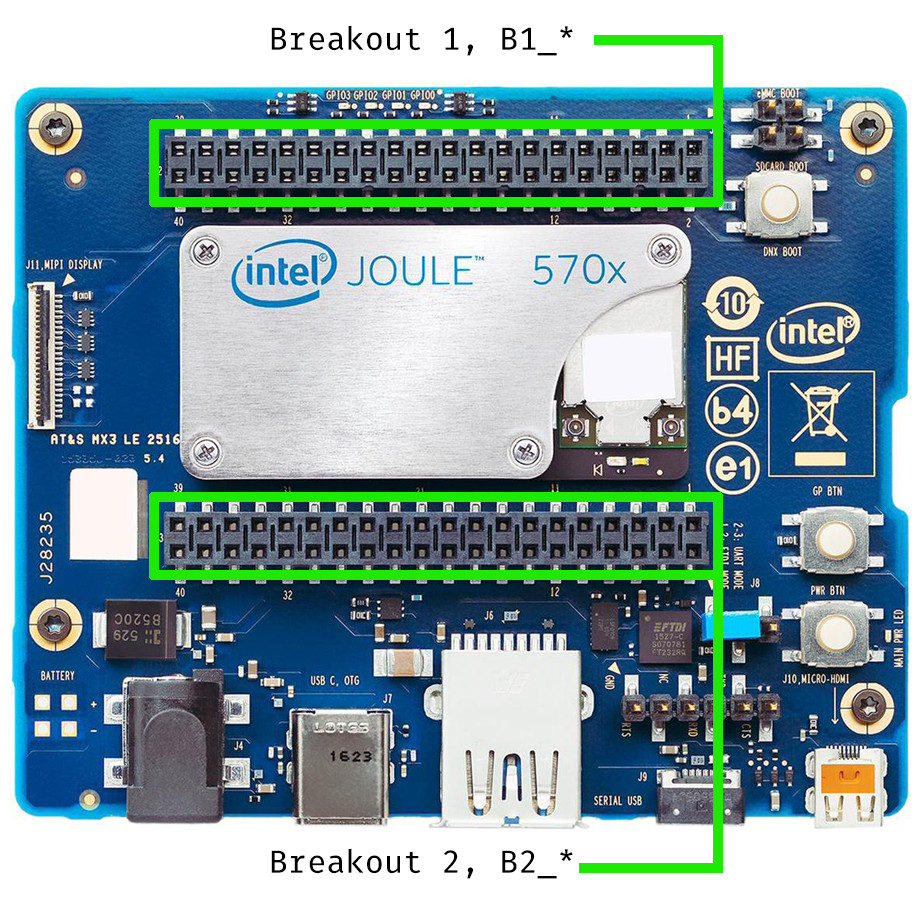
The Intel Joule + Carrier Breakout has two "Breakout connectors":
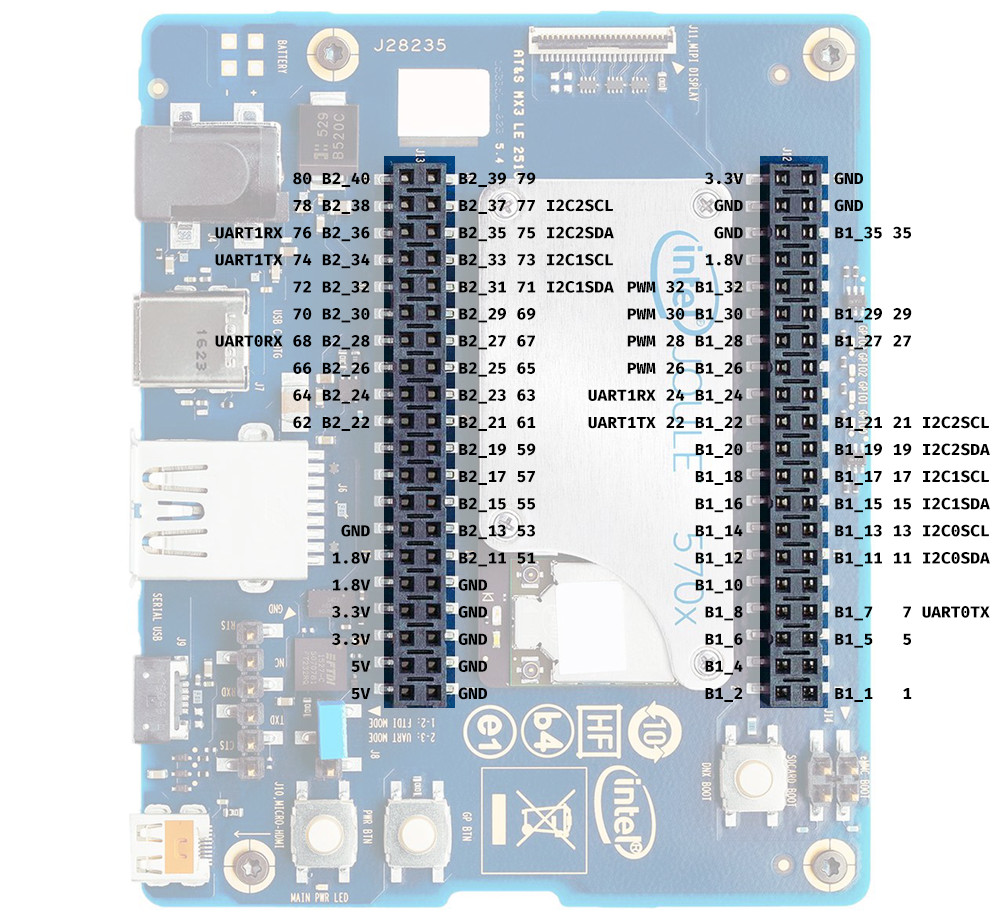
The usable pins and additional capabilities are shown here:
Pins may be addressed by either "Breakout Name" or "Pin Number":
Breakout Name
Pin Number
Capability
B1_1
1
GPIO
B1_2
2
GPIO
B1_4
4
GPIO
B1_5
5
GPIO
B1_6
6
GPIO
B1_7
7
GPIO, UART 0 TX
B1_8
8
GPIO
B1_10
10
GPIO
B1_11
11
GPIO, I2C 0 SDA
B1_12
12
GPIO
B1_13
13
GPIO, I2C 0 SCL
B1_14
14
GPIO
B1_15
15
GPIO, I2C 1 SDA
B1_16
16
GPIO
B1_17
17
GPIO, I2C 1 SCL
B1_18
18
GPIO
B1_19
19
GPIO, I2C 2 SDA
B1_20
20
GPIO
B1_21
21
GPIO, I2C 2 SCL
B1_22
22
GPIO, UART 1 TX
B1_24
24
GPIO, UART 1 RX
B1_26
26
GPIO, PWM 0
B1_28
28
GPIO, PWM 1
B1_30
30
GPIO, PWM 2
B1_32
32
GPIO, PWM 3
B1_35
35
GPIO
B2_11
51
GPIO
B2_13
53
GPIO
B2_15
55
GPIO
B2_17
57
GPIO
B2_19
59
GPIO
B2_21
61
GPIO
B2_22
62
GPIO
B2_23
63
GPIO
B2_24
64
GPIO
B2_25
65
GPIO
B2_26
66
GPIO
B2_27
67
GPIO
B2_28
68
GPIO, UART 0 RX
B2_29
69
GPIO
B2_30
70
GPIO
B2_31
71
GPIO, I2C 1 SDA
B2_32
72
GPIO
B2_33
73
GPIO, I2C 1 SCL
B2_34
74
GPIO, UART 1 TX
B2_35
75
GPIO, I2C 2 SDA
B2_36
76
GPIO, UART 1 RX
B2_37
77
GPIO, I2C 1 SCL
B2_39
79
GPIO
B2_40
80
GPIO
L0, GP100
100
LED100
L1, GP101
101
LED101
L2, GP102
102
LED102
L3, GP103
103
LED103
NOTES
LED100, LED101 and LED102 do not work correctly. This is a known issue in the platform itself, with work in progress to fix the issues.
I2C Bus 0 is used by default when no bus is explicitly provided.
I2C Bus 1 or 2 must be specified explicitly by providing a bus: ... property to the instantiation options (see "BLINKM" example below).
Basic Example:
npm install joule-io johnny-five
var five = require("johnny-five");
var Joule = require("joule-io");
var board = new five.Board({
  io: new Joule()
});

board.on("ready", function() {
  var led = new five.Led(103);
  led.blink(500);
});
var five = require("johnny-five");
var Joule = require("joule-io");
var board = new five.Board({
  io: new Joule()
});

board.on("ready", function() {
  var rgb = new five.Led.RGB({
    // Specifying an alternate bus:
    bus: 1,
    controller: "BLINKM",
  });

  rgb.color("red");
});
Intel Edison Arduino
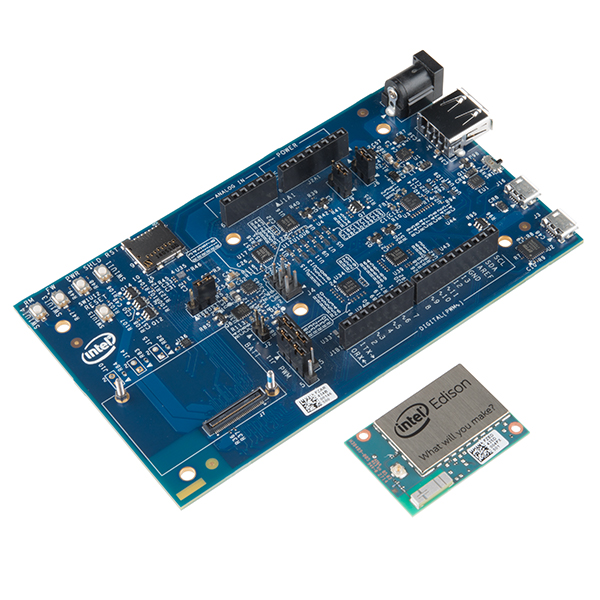
The Intel Edison + Arduino Breakout has a pin-out form similar to an Arduino Uno. Use the pin numbers as printed on the board, eg. 3, 13, or "A0".
Example:
npm install edison-io johnny-five
var five = require("johnny-five");
var Edison = require("edison-io");
var board = new five.Board({
  io: new Edison()
});

board.on("ready", function() {
  var led = new five.Led(13);
  led.blink(500);
});
Intel Edison Mini Breakout
The Intel Edison + Mini Breakout has a dense pin-out form comprised of four rows, J17, J18, and J19, J20. Each pin is numbered, left-to-right, from 14 to 1 (if looking from the back). Use the row and column name ("J17-1"), or the corresponding GPIO ("GP182"), or pin number 0, to interact with that pin. (Note: "J17-1", "GP182" and 0 refer to the same pin). See the table of valid pins below to determine corresponding Pin names and numbers. *
Connection to bus 1:
I2C-1-SDA
I2C-1-SCL
J17-8
J18-6
Example:
npm install edison-io johnny-five
var five = require("johnny-five");
var Edison = require("edison-io");
var board = new five.Board({
  io: new Edison()
});

board.on("ready", function() {
  var led = new five.Led("J17-1");
  /*
    Same as:

    var led = new five.Led(0);
    var led = new five.Led("GP182");
   */
  led.blink(500);
});
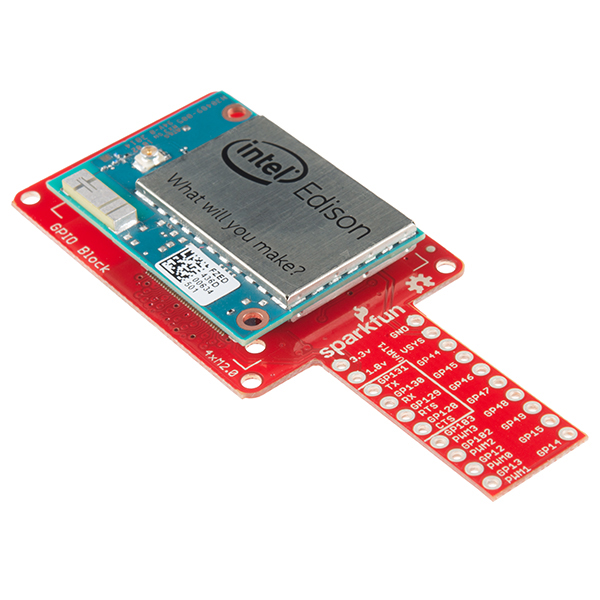
SparkFun Edison GPIO Block
The SparkFun Edison GPIO Block has two columns of pins. Use the GPIO name printed on the board ("GP44"), or the corresponding row and column name ("J19-4"), or pin number (31), to interact with that pin. (Note: "J19-4", "GP44" and 31 refer to the same pin). See the table of valid pins below to determine corresponding Pin names and numbers. *
Example:
npm install edison-io johnny-five
var five = require("johnny-five");
var Edison = require("edison-io");
var board = new five.Board({
  io: new Edison()
});

board.on("ready", function() {
  var led = new five.Led("GP44");
  /*
    Same as:

    var led = new five.Led(31);
    var led = new five.Led("J19-4");
   */
  led.blink(500);
});
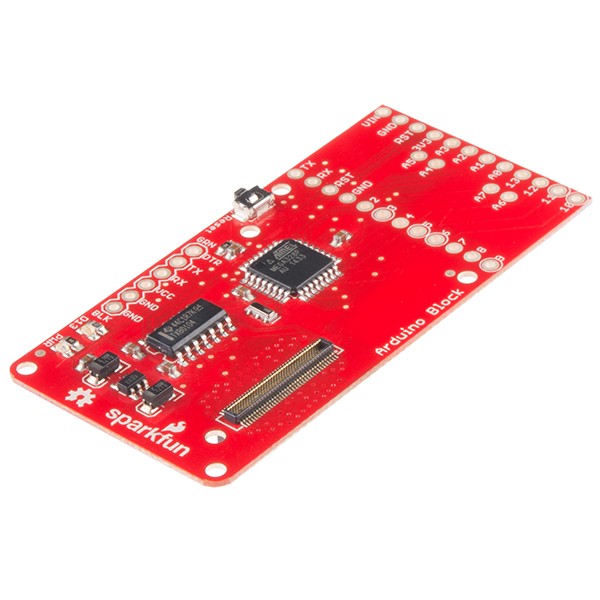
SparkFun Edison Arduino Block
The SparkFun Edison Arduino Block connects to the Edison via Serial1, or /dev/ttyMFD1. This means that a user must upload StandardFirmata via FTDI programmer. Johnny-Five does not use Galileo/Edison/Joule-IO to communicate with the hardware on this block, instead it communicates via the serial connection, using its default Firmata.js (this is installed by Johnny-Five automattically. The port name must be specified:
// This code runs on the Edison, communicating with the
// SparkFun Arduino Block via Serial1 (/dev/ttyMFD1)
var five = require("johnny-five");
var board = new five.Board({
  port: "/dev/ttyMFD1"
});

board.on("ready", function() {
  var led = new five.Led(13);
  led.blink(500);
});
SparkFun Edison I2C Block
Galileo/Edison/Joule-IO/Edison-IO will automatically connect to bus 1, which is the bus used by this block.
SparkFun Edison 9DOF Block
Galileo/Edison/Joule-IO/Edison-IO will automatically connect to bus 1, which is the bus used by this block.
Edison Mini Pin Mapping Table *
Pin Number
Physical Pin
Edison Pin
0
J17-1
GP182
4
J17-5
GP135
6
J17-7
GP27
7
J17-8
GP20
8
J17-9
GP28
9
J17-10
GP111
10
J17-11
GP109
11
J17-12
GP115
13
J17-14
GP128
14
J18-1
GP13
15
J18-2
GP165
19
J18-6
GP19
20
J18-7
GP12
21
J18-8
GP183
23
J18-10
GP110
24
J18-11
GP114
25
J18-12
GP129
26
J18-13
GP130
31
J19-4
GP44
32
J19-5
GP46
33
J19-6
GP48
35
J19-8
GP131
36
J19-9
GP14
37
J19-10
GP40
38
J19-11
GP43
39
J19-12
GP77
40
J19-13
GP82
41
J19-14
GP83
45
J20-4
GP45
46
J20-5
GP47
47
J20-6
GP49
48
J20-7
GP15
49
J20-8
GP84
50
J20-9
GP42
51
J20-10
GP41
52
J20-11
GP78
53
J20-12
GP79
54
J20-13
GP80
55
J20-14
GP81
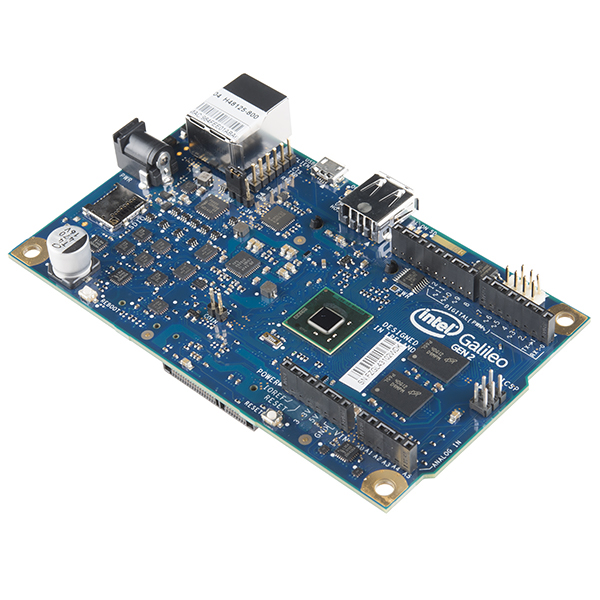
Intel Galileo Gen 2
Or Gen 1 if you're a glutton for punishment.
The Intel Galileo Gen 2 has a pin-out form similar to an Arduino Uno. Use the pin numbers as printed on the board, eg. 3, 13, or "A0".
Example:
var five = require("johnny-five");
var Galileo = require("galileo-io");
var board = new five.Board({
  io: new Galileo()
});

board.on("ready", function() {
  var led = new five.Led(13);
  led.blink(500);
});
Blink an Led
The "Hello World" of microcontroller programming:
(attach an LED on pin 9)
var Galileo = require("galileo-io");
var board = new Galileo();

board.on("ready", function() {
  var byte = 0;
  this.pinMode(9, this.MODES.OUTPUT);

  setInterval(function() {
    board.digitalWrite(9, (byte ^= 1));
  }, 500);
});
Johnny-Five IO Plugin
Galileo/Edison/Joule-IO is the default IO layer for Johnny-Five programs that are run on a Galileo or Edison board.
Note: On the Edison, you should require johnny-five first, followed by galileo-io. Otherwise you'll get a segmentation fault.
npm install edison-io johnny-five
Example:
var five = require("johnny-five");
var Edison = require("edison-io");
var board = new five.Board({
  io: new Edison()
});
Specify An I2C Bus
Galileo/Edison/Joule-IO will do it's best to detect the correct I2C bus to use for a given expansion board, however the process is not infallible. To specify an I2C bus:
// If the i2c bus is 1 (`/dev/i2c-1`)
var board = new Galileo({
  i2c: {
    bus: 1
  }
});
Or...
var board = new Edison({
  i2c: {
    bus: 1
  }
});
Xadow Board
Expansion boards can also be initialized with a built-in configuration object, that contains the correct I2C bus for that board:
npm install edison-io johnny-five
Example:
var five = require("johnny-five");
var Edison = require("edison-io");
var board = new five.Board({
  io: new Edison(Edison.Boards.Xadow)
});
Or
var five = require("johnny-five");
var Galileo = require("galileo-io");
var board = new five.Board({
  io: new Galileo(Galileo.Boards.Xadow)
});
Additional expansion board configurations will be added as support is implemented
API
digitalWrite(pin, 1|0)
Sets the pin to 1 or 0, which either connects it to 5V (the maximum voltage of the system) or to GND (ground).
Example:
// This will turn on the pin
board.digitalWrite(9, 1);
analogWrite(pin, value)
Sets the pin to a value between 0 and 255, where 0 is the same as LOW and 255 is the same as HIGH. This is sort of like sending a voltage between 0 and 5V, but since this is a digital system, it uses a mechanism called Pulse Width Modulation, or PWM. You could use analogWrite to dim an LED, as an example.
Example:
// Crank an LED to full brightness
board.analogWrite(9, 255);
servoWrite(pin, value)
Set the pin to a value between 0-180° to move the servo's horn to the corresponding position.
Example:
board.servoWrite(9, 180);
digitalRead(pin, handler) Setup a continuous read handler for specific digital pin.
This will read the digital value of a pin, which can be read as either HIGH or LOW. If you were to connect the pin to 5V, it would read HIGH (1); if you connect it to GND, it would read LOW (0). Anywhere in between, it’ll probably read whichever one it’s closer to, but it gets dicey in the middle.
Example:
// Log all the readings for 9
board.digitalRead(9, function(data) {
  console.log(data);
});
analogRead(pin, handler) Setup a continuous read handler for specific analog pin.
This will read the analog value of a pin, which is a value from 0 to 4095, where 0 is LOW (GND) and 4095 is HIGH (5V). All of the analog pins (A0 to A5) can handle this. analogRead is great for reading data from sensors.
Example:
// Log all the readings for A1
board.analogRead("A1", function(data) {
  console.log(data);
});
TopGit's last sync did not record any GitHub topics for rwaldron/galileo-io. GitHub topics appear in the right sidebar of a repository page; that's the authoritative place to check.
How active is development on rwaldron/galileo-io?
The most recent commit recorded on rwaldron/galileo-io was 9.5 years ago, based on the GitHub push timestamp. The repository has 26 forks — one of the better signals of community interest.
How many stars does rwaldron/galileo-io have?
rwaldron/galileo-io has 101 GitHub stars — refresh the page for the live number, or check github.com/rwaldron/galileo-io. TopGit mirrors GitHub's count but does not claim minute-by-minute accuracy.
What is rwaldron/galileo-io?
rwaldron/galileo-io (rwaldron/galileo-io) is a JavaScript project on GitHub. From the project's own README: Intel Galileo & Intel Edison IO Plugin for Johnny-Five
What language is rwaldron/galileo-io written in?
rwaldron/galileo-io is written primarily in JavaScript. GitHub's language field is based on the largest share of bytes in the default branch.
Read full README in the tab above.
Still deciding about galileo-io?
One click hands the question to an AI along with this page — see what it says about galileo-io.
 /galileo-io