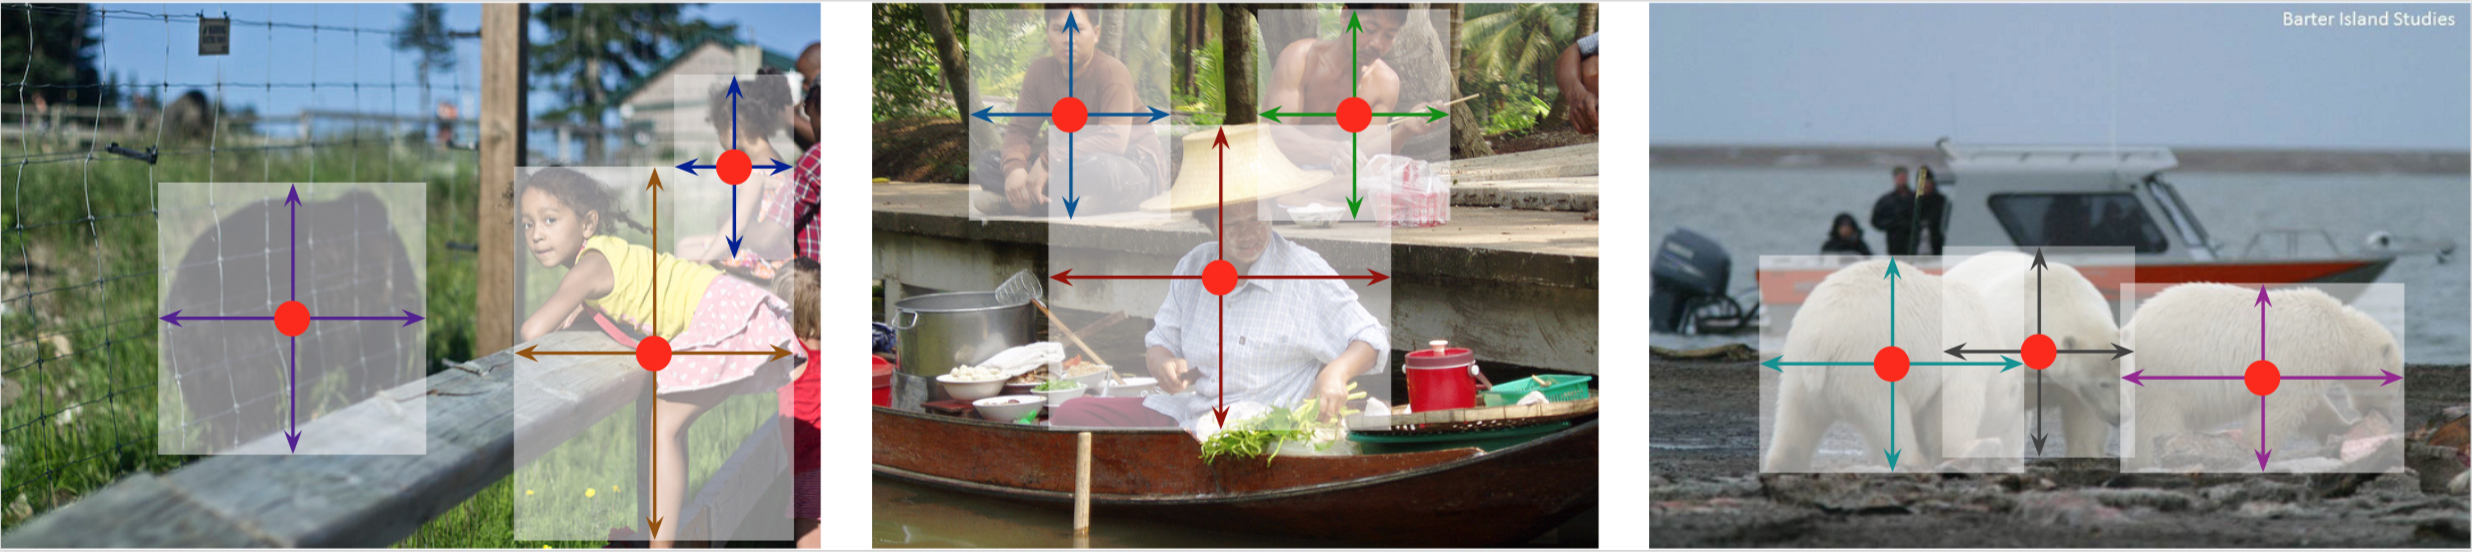
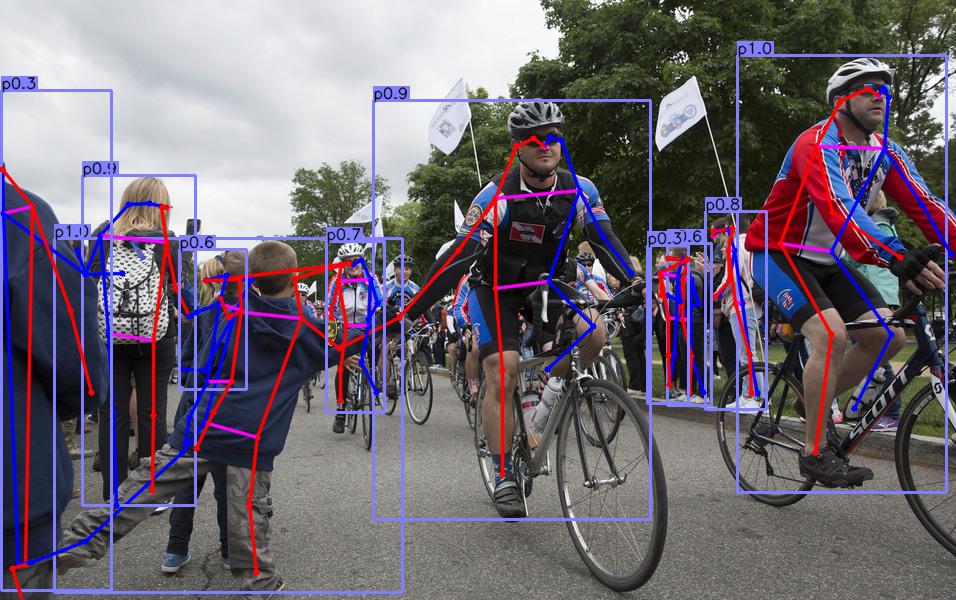
Snapshot of xingyizhou/CenterNet: 7.6k★, Python. Object detection, 3D detection, and pose estimation using center point detection:
Snapshot summary built from the project's own GitHub metadata — there's no written TopGit review yet. The page will update automatically when a full review is published.
WHY NO REVIEW YET
TopGit writes full reviews for the most-starred, most-requested repositories. This page is a snapshot until then — see the READ ME tab for the original README in full.
Object detection, 3D detection, and pose estimation using center point detection:
Objects as Points,
Xingyi Zhou, Dequan Wang, Philipp Krähenbühl, arXiv technical report (arXiv 1904.07850)
Contact: [email protected]. Any questions or discussions are welcomed!
Updates
(June, 2020) We released a state-of-the-art Lidar-based 3D detection and tracking framework CenterPoint.
(April, 2020) We released a state-of-the-art (multi-category-/ pose-/ 3d-) tracking extension CenterTrack.
Abstract
Detection identifies objects as axis-aligned boxes in an image. Most successful object detectors enumerate a nearly exhaustive list of potential object locations and classify each. This is wasteful, inefficient, and requires additional post-processing. In this paper, we take a different approach. We model an object as a single point -- the center point of its bounding box. Our detector uses keypoint estimation to find center points and regresses to all other object properties, such as size, 3D location, orientation, and even pose. Our center point based approach, CenterNet, is end-to-end differentiable, simpler, faster, and more accurate than corresponding bounding box based detectors. CenterNet achieves the best speed-accuracy trade-off on the MS COCO dataset, with 28.1% AP at 142 FPS, 37.4% AP at 52 FPS, and 45.1% AP with multi-scale testing at 1.4 FPS. We use the same approach to estimate 3D bounding box in the KITTI benchmark and human pose on the COCO keypoint dataset. Our method performs competitively with sophisticated multi-stage methods and runs in real-time.
Highlights
Simple: One-sentence method summary: use keypoint detection technic to detect the bounding box center point and regress to all other object properties like bounding box size, 3d information, and pose.
Versatile: The same framework works for object detection, 3d bounding box estimation, and multi-person pose estimation with minor modification.
Fast: The whole process in a single network feedforward. No NMS post processing is needed. Our DLA-34 model runs at 52 FPS with 37.4 COCO AP.
Strong: Our best single model achieves 45.1AP on COCO test-dev.
Easy to use: We provide user friendly testing API and webcam demos.
Main results
Object Detection on COCO validation
Backbone
AP / FPS
Flip AP / FPS
Multi-scale AP / FPS
Hourglass-104
40.3 / 14
42.2 / 7.8
45.1 / 1.4
DLA-34
37.4 / 52
39.2 / 28
41.7 / 4
ResNet-101
34.6 / 45
36.2 / 25
39.3 / 4
ResNet-18
28.1 / 142
30.0 / 71
33.2 / 12
Keypoint detection on COCO validation
Backbone
AP
FPS
Hourglass-104
64.0
6.6
DLA-34
58.9
23
3D bounding box detection on KITTI validation
Backbone
FPS
AP-E
AP-M
AP-H
AOS-E
AOS-M
AOS-H
BEV-E
BEV-M
BEV-H
DLA-34
32
96.9
87.8
79.2
93.9
84.3
75.7
34.0
30.5
26.8
All models and details are available in our Model zoo.
Installation
Please refer to INSTALL.md for installation instructions.
Use CenterNet
We support demo for image/ image folder, video, and webcam.
First, download the models (By default, ctdet_coco_dla_2x for detection and
multi_pose_dla_3x for human pose estimation)
from the Model zoo and put them in CenterNet_ROOT/models/.
The result for the example images should look like:
You can add --debug 2 to visualize the heatmap outputs.
You can add --flip_test for flip test.
To use this CenterNet in your own project, you can
import sys
CENTERNET_PATH = /path/to/CenterNet/src/lib/
sys.path.insert(0, CENTERNET_PATH)

from detectors.detector_factory import detector_factory
from opts import opts

MODEL_PATH = /path/to/model
TASK = 'ctdet' # or 'multi_pose' for human pose estimation
opt = opts().init('{} --load_model {}'.format(TASK, MODEL_PATH).split(' '))
detector = detector_factory[opt.task](opt)

img = image/or/path/to/your/image/
ret = detector.run(img)['results']
ret will be a python dict: {category_id : [[x1, y1, x2, y2, score], ...], }
Benchmark Evaluation and Training
After installation, follow the instructions in DATA.md to setup the datasets. Then check GETTING_STARTED.md to reproduce the results in the paper.
We provide scripts for all the experiments in the experiments folder.
Develop
If you are interested in training CenterNet in a new dataset, use CenterNet in a new task, or use a new network architecture for CenterNet, please refer to DEVELOP.md. Also feel free to send us emails for discussions or suggestions.
Third-party resources
CenterNet + embedding learning based tracking: FairMOT from Yifu Zhang.
Detectron2 based implementation: CenterNet-better from Feng Wang.
Keras Implementation: keras-centernet from see-- and keras-CenterNet from xuannianz.
MXnet implementation: mxnet-centernet from Guanghan Ning.
Stronger human open estimation models: centerpose from tensorboy.
TensorRT extension with ONNX models: TensorRT-CenterNet from Wengang Cao.
CenterNet + DeepSORT tracking implementation: centerNet-deep-sort from kimyoon-young.
Blogs on training CenterNet on custom datasets (in Chinese): ships from Rhett Chen and faces from linbior.
License
CenterNet itself is released under the MIT License (refer to the LICENSE file for details).
Portions of the code are borrowed from human-pose-estimation.pytorch (image transform, resnet), CornerNet (hourglassnet, loss functions), dla (DLA network), DCNv2(deformable convolutions), tf-faster-rcnn(Pascal VOC evaluation) and kitti_eval (KITTI dataset evaluation). Please refer to the original License of these projects (See NOTICE).
Citation
If you find this project useful for your research, please use the following BibTeX entry.
@inproceedings{zhou2019objects,
  title={Objects as Points},
  author={Zhou, Xingyi and Wang, Dequan and Kr{\"a}henb{\"u}hl, Philipp},
  booktitle={arXiv preprint arXiv:1904.07850},
  year={2019}
}
TopGit's last sync did not record any GitHub topics for xingyizhou/CenterNet. GitHub topics appear in the right sidebar of a repository page; that's the authoritative place to check.
How active is development on xingyizhou/CenterNet?
The most recent commit recorded on xingyizhou/CenterNet was 3.7 years ago, based on the GitHub push timestamp. The repository has 1.9k forks — one of the better signals of community interest.
How many stars does xingyizhou/CenterNet have?
xingyizhou/CenterNet has 7.6k GitHub stars — refresh the page for the live number, or check github.com/xingyizhou/CenterNet. TopGit mirrors GitHub's count but does not claim minute-by-minute accuracy.
What language is xingyizhou/CenterNet written in?
xingyizhou/CenterNet is written primarily in Python. GitHub's language field is based on the largest share of bytes in the default branch.
Where do I read more about xingyizhou/CenterNet?
This TopGit page is a snapshot — the READ ME tab shows the project's own README content (links stripped, images preserved). The GitHub repository at github.com/xingyizhou/CenterNet is the definitive source.
Read full README in the tab above.
Is CenterNet worth your time?
ChatGPT, Claude and Perplexity can all read this page. Ask one of them what it makes of CenterNet.

 /CenterNet